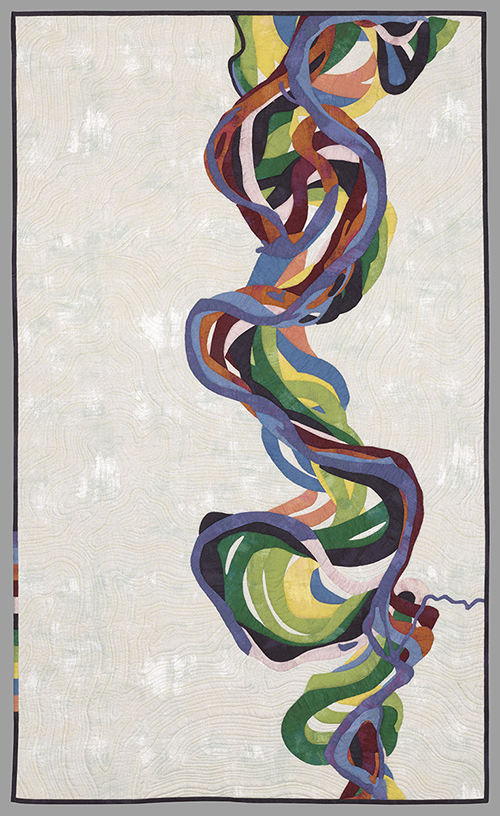
Explorations: Journeys in Creativity, The Quilt Artist’s Studio" was an exhibition from the Massachussetts / Rhode Island region of SAQA. Each of the 24 selected artists were asked to create an original 30’’ x 50’’ artwork and document their design process. The concept is to bring the viewer into the quilt artist’s studio to give them a feel for the creative process as expressed in art quilts.
Some of the participating artists have generously shared their design process with us to include in SAQA Seminar: Visual Design.
DESIGN PROCESS
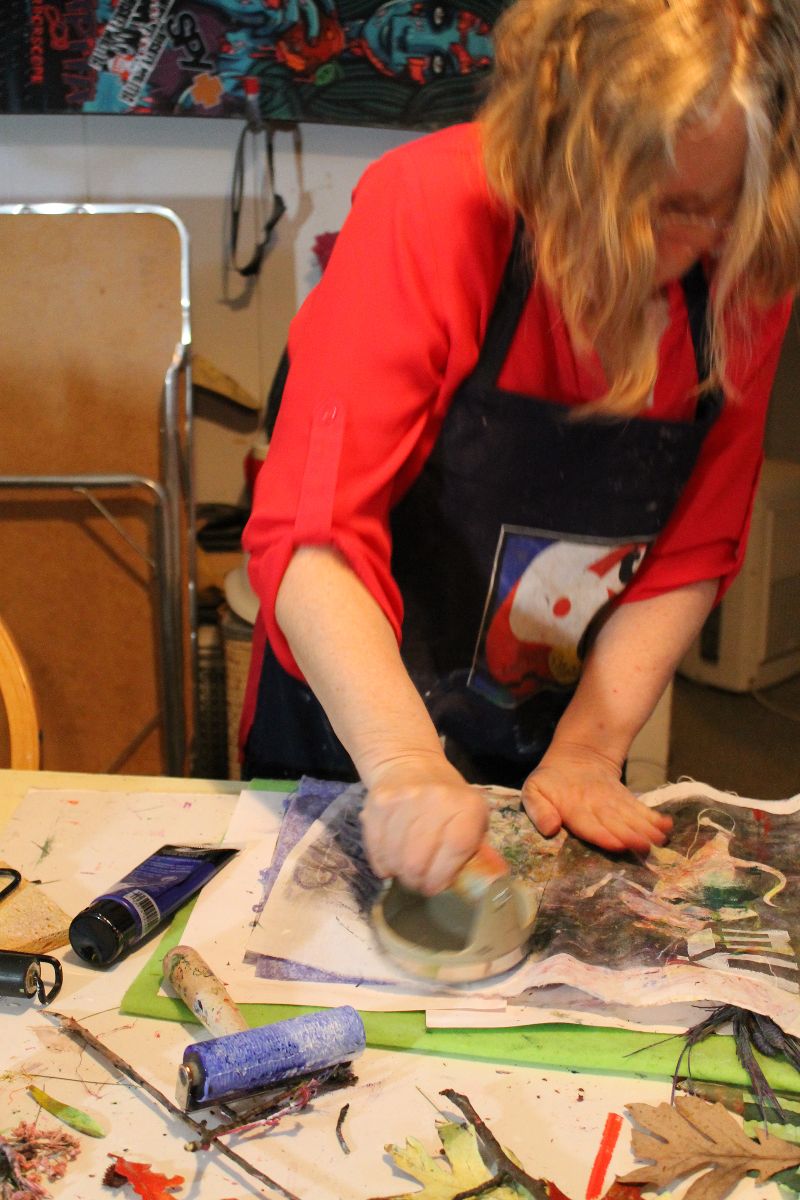
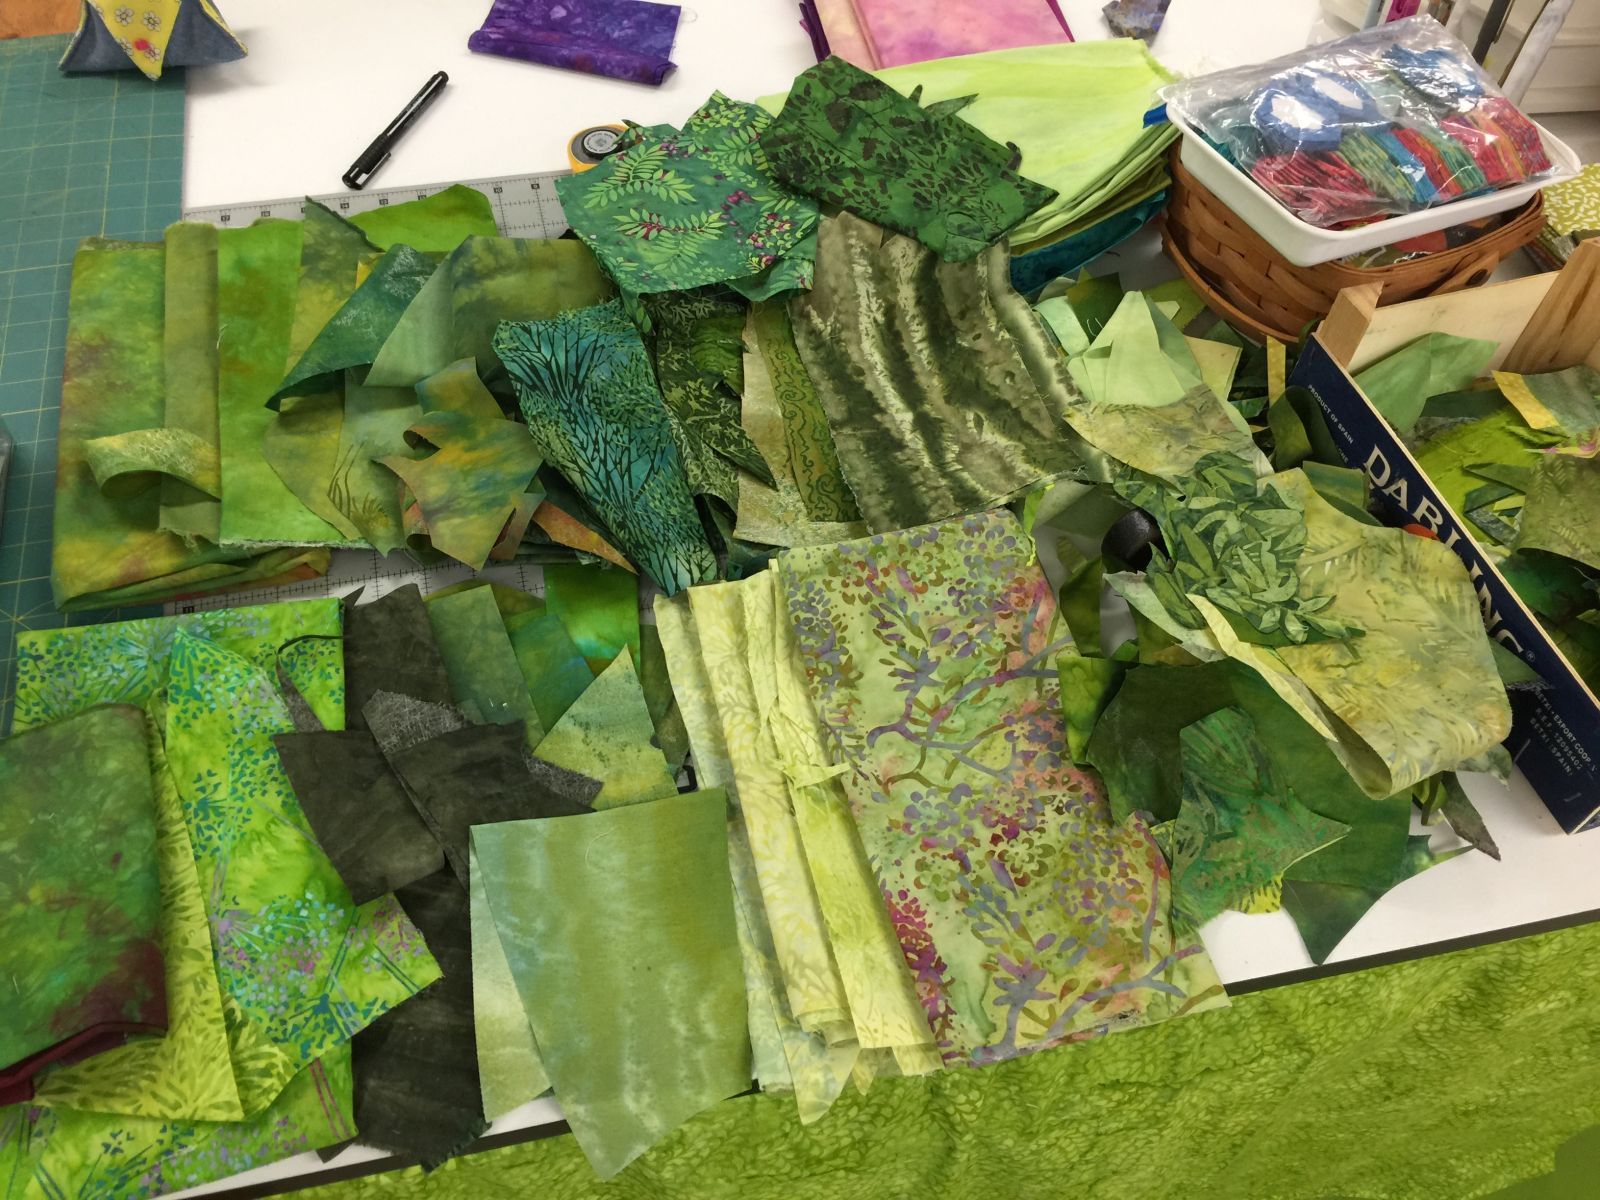
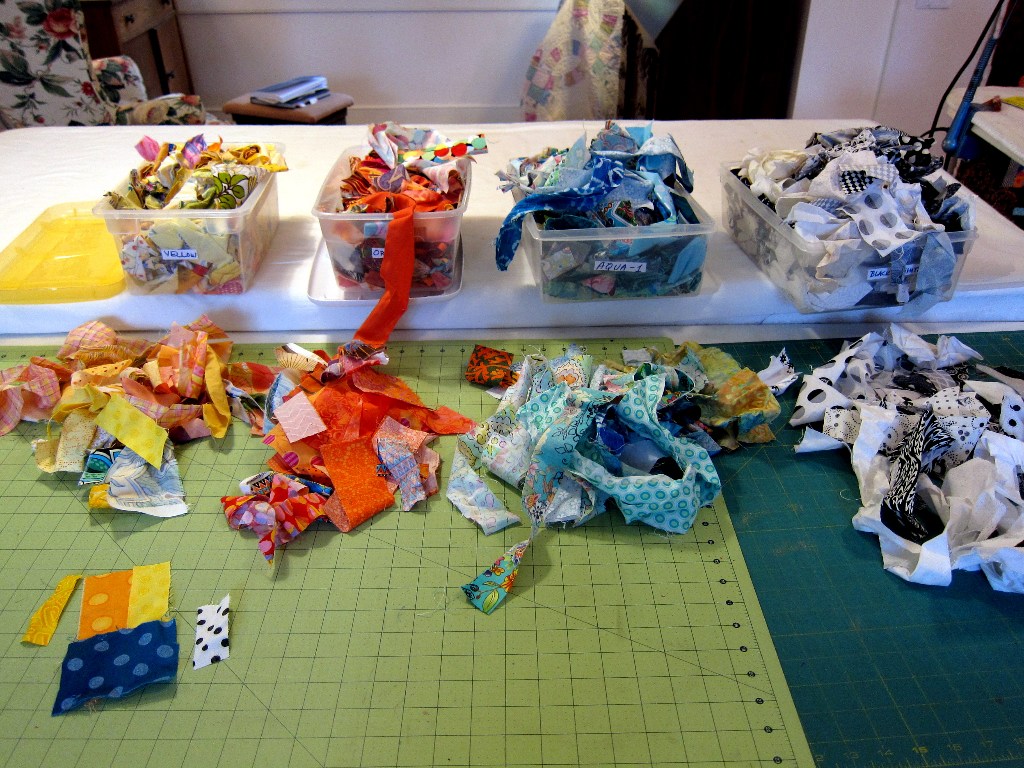
Gelatin printing on fabric is just part of my process. It is how I create the fabrics I will use in my quilts. I print on fabrics I have in my stash, but also on fat quarters when there is a big sale. The commercial patterns create an interesting frission with the printed images. Before I begin printing I chose a pile of fabrics giving them a cursory ironing to make them easier to print. I gather a collection of objects that I want to use to create impressions on my gelatin plate. Some of the objects come from my walks in the woods. Others are random found objects such a bubble wrap and fruit netting.
The process is pretty intuitive. I begin by putting acrylic paint on my plate (process 1).
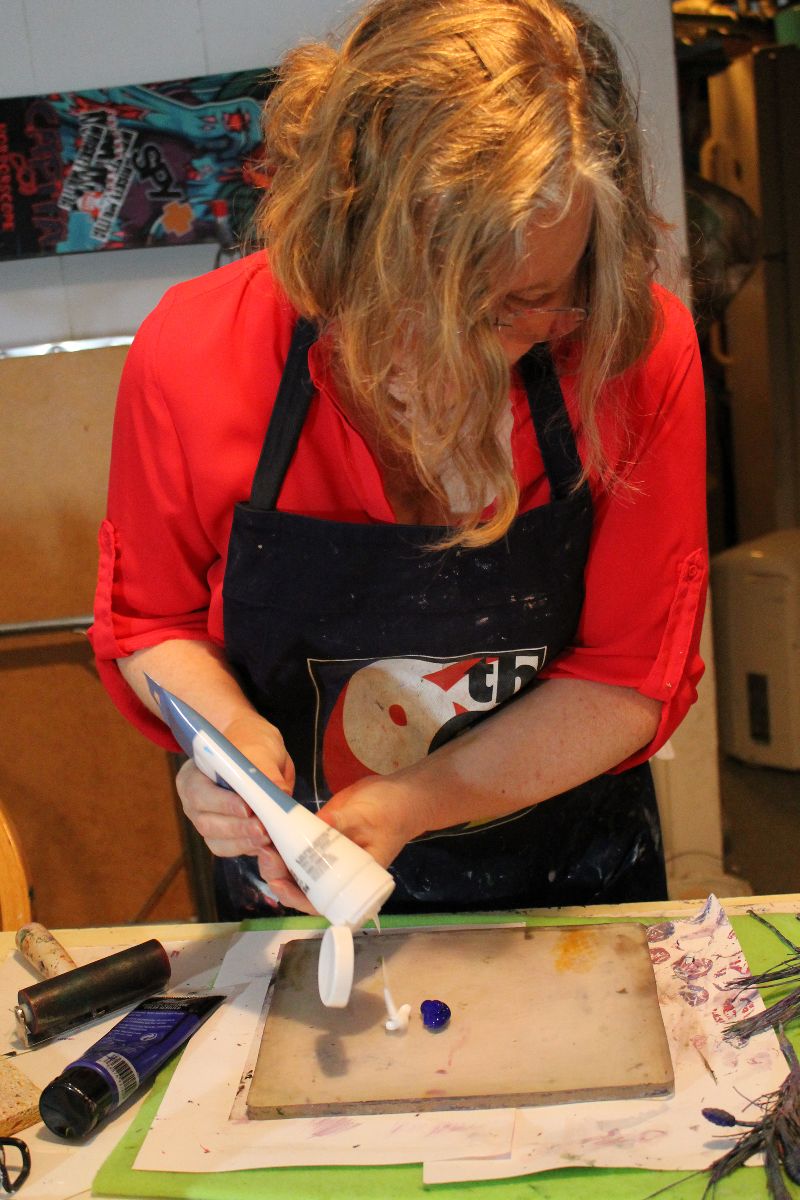
I spread the paint with a brayer, not necessarily covering the whole plate (process 2). A random edge can soften an image.
Then I place the object I am going to print on the plate (process 3).
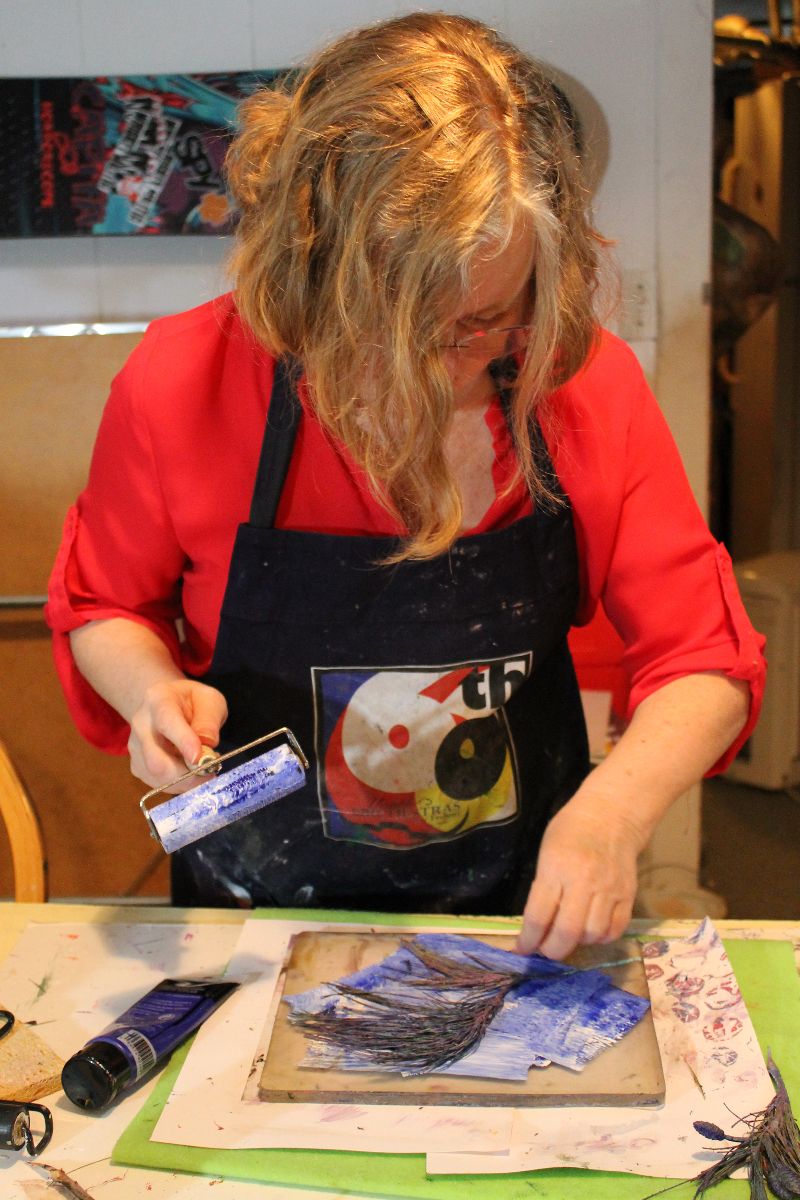
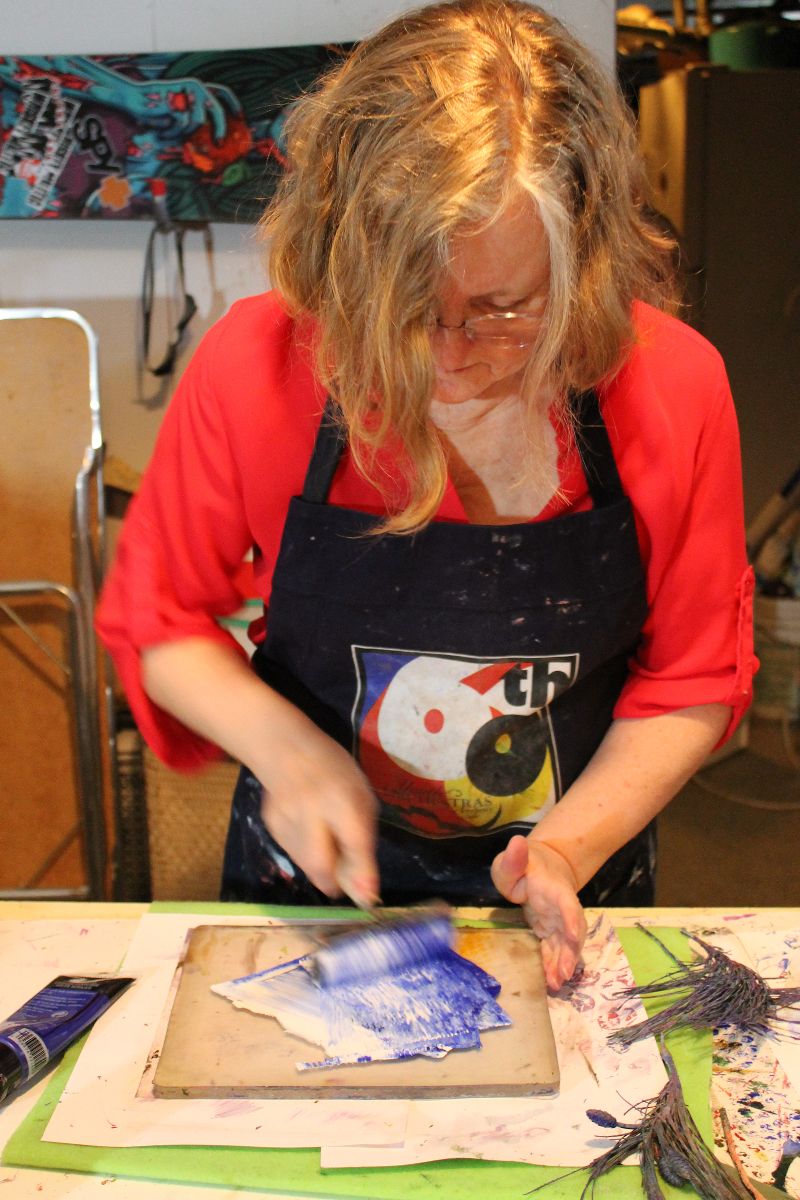
I place the fabric over the plate (process 4).
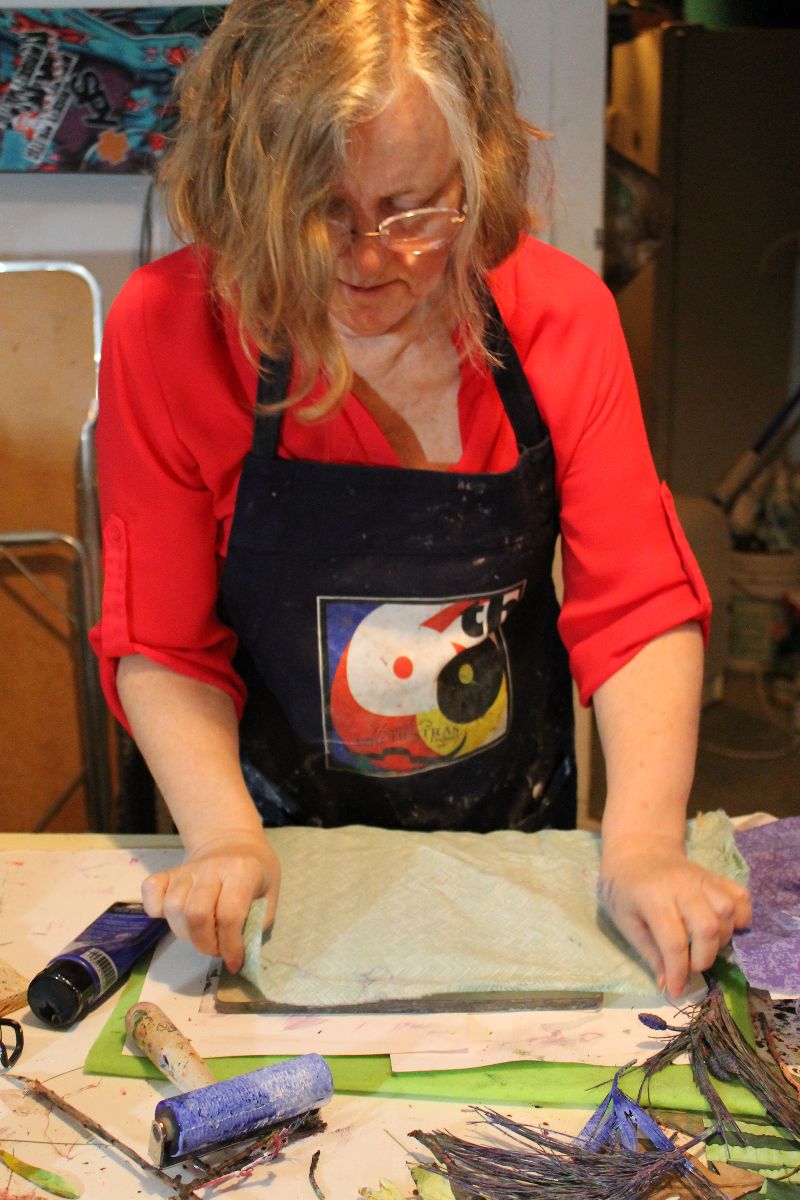
Next I use a baren to press the fabric to the plate (process 5). Sometimes I print the object as a negative image.
Other times I lift away the object and print the ghost (process 6). I continue printing and build up several layers. I try to make the fabric interesting, but not look like a completed print.
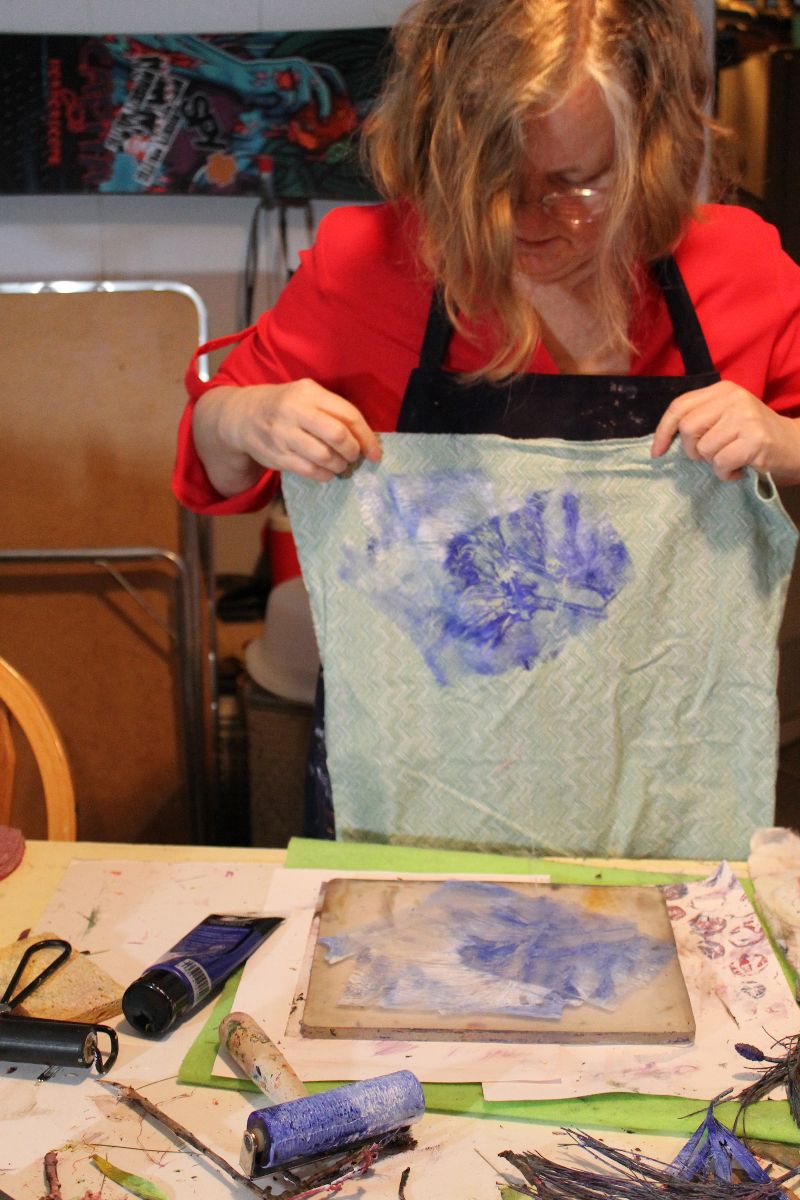
After the fabrics have dried, I look at them, rearrange them, cut them up and rearrange them again (process 7).

Then I begin pinning pieces to my design wall (process 8).
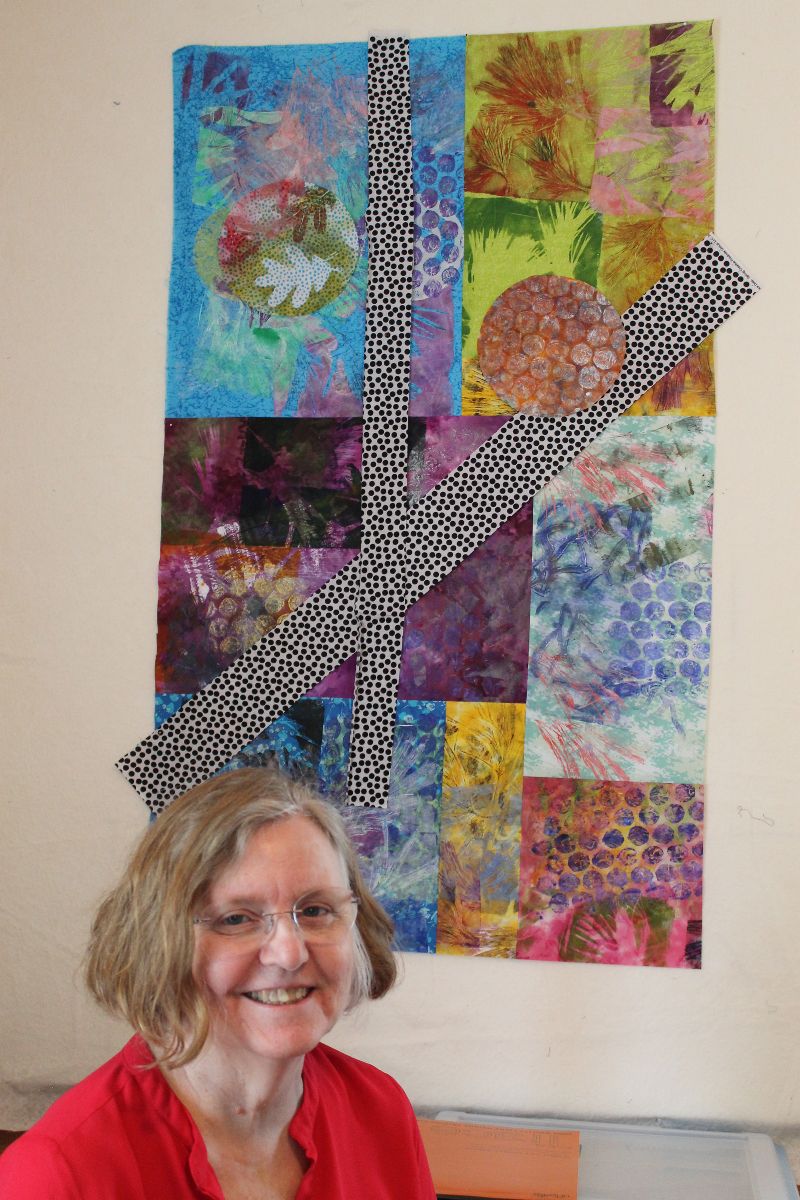
When I am mostly satisfied I begin sewing, still leaving myself the option to change things (process 9).
For more details about Sue and her work, please her website at: http://suecolozzi.com/
DESIGN PROCESS
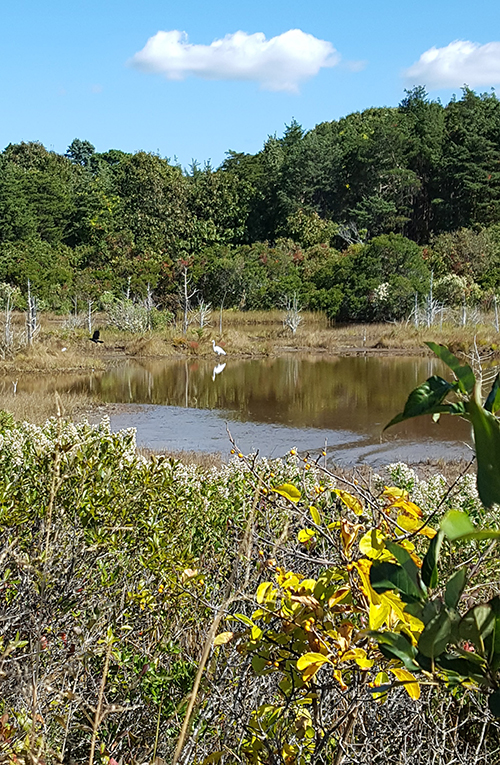
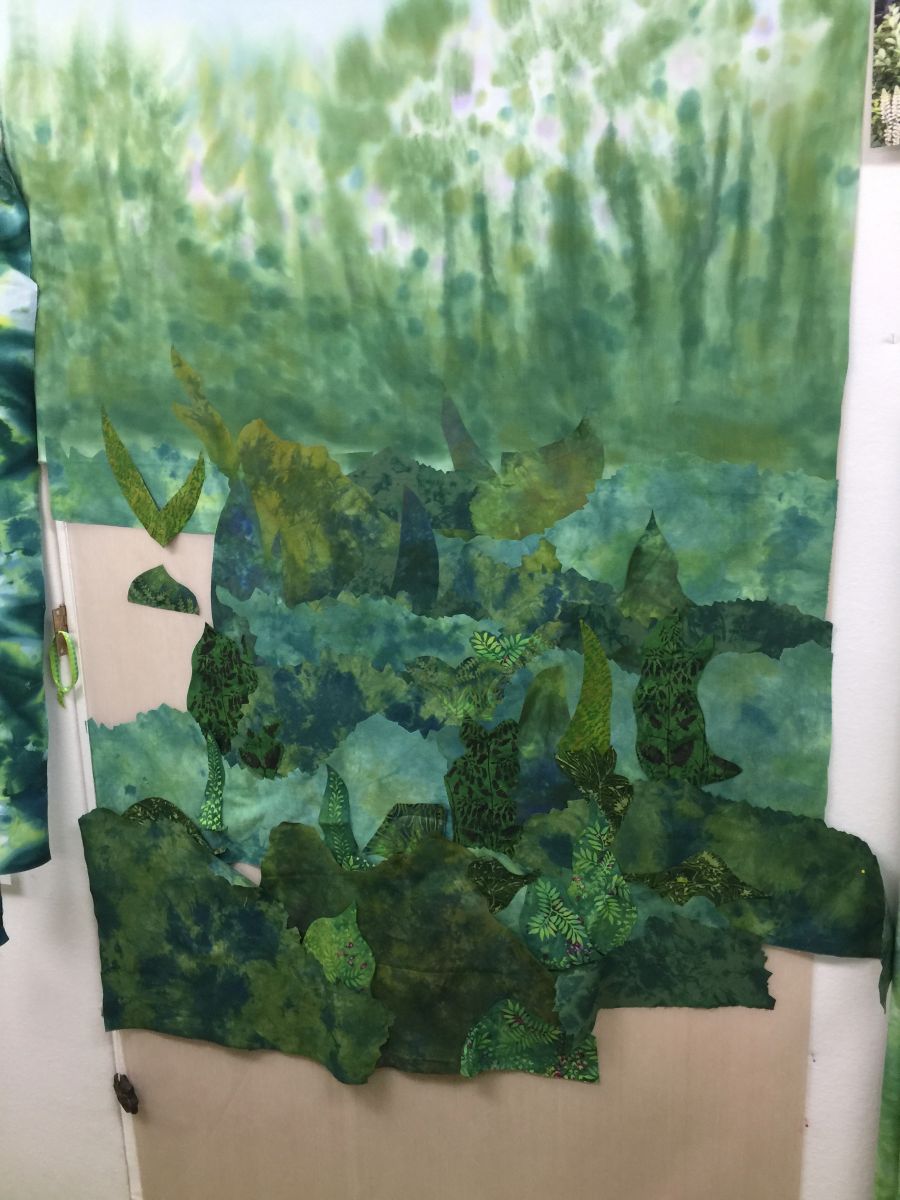
My inspiration photo taken on Little Neck Bars Rd. in West Falmouth

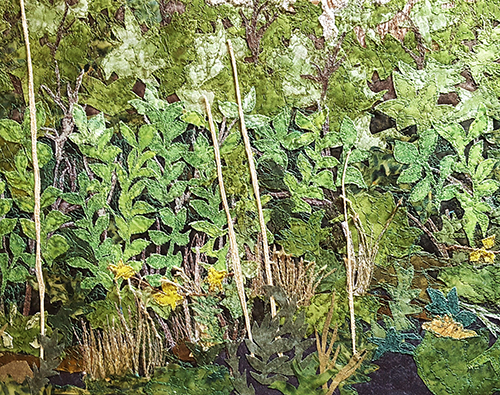
Placing foliage shapes cut from fusible backed fabrics
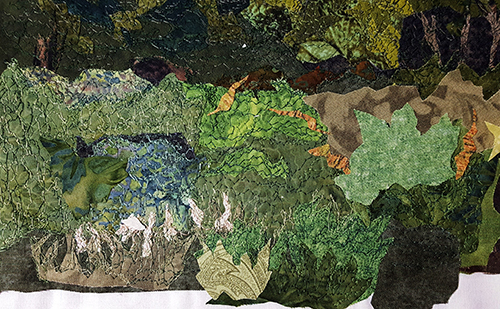
Adding more foliage and free motion stitching over each piece
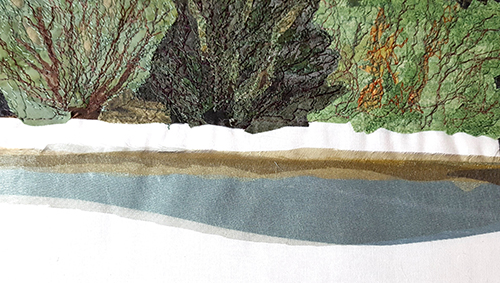
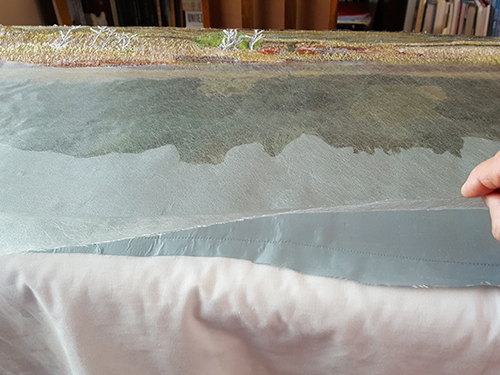
Adding a base of blue silk and then layering fusible backed organza over it to add depth and create soil reflections
Layering fabric cut into grass-like shapes and thread sketching over them
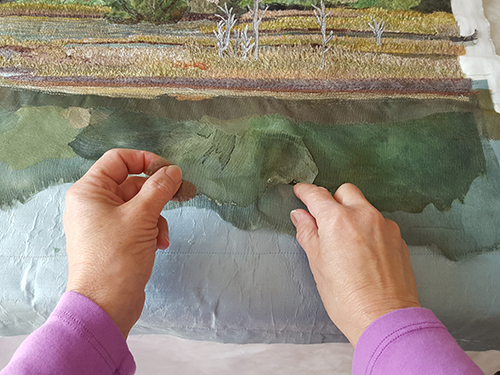
Trimming painted organza to form foliage reflections and adhering the layers over the silk base
Stitching along the edges of organza with invisible thread
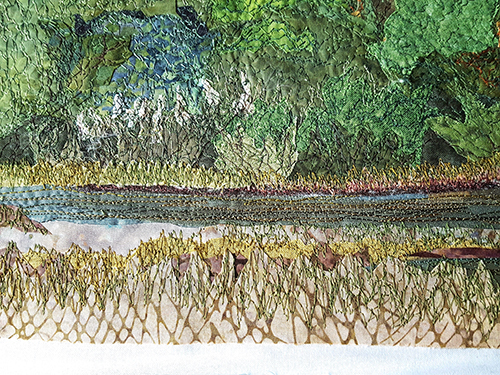
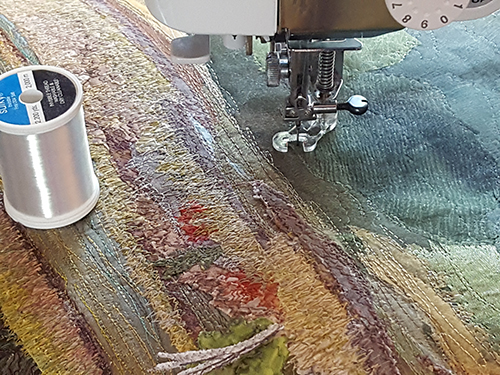
Covering the water fabrics with a layer of chiffon
Stitching over water fabrics with rayon thread to create the effect of water movement
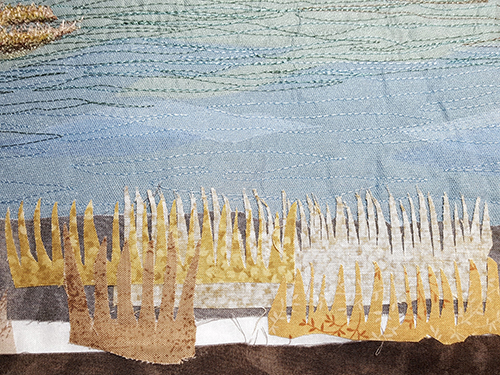
Layering grassy shapes for foreground foliage
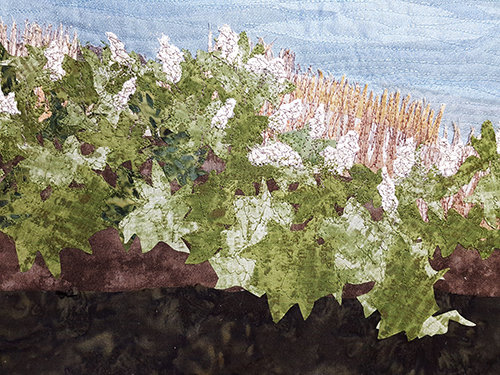
Front foliage with “blossoms” layered over grass
Foreground with leafy shapes and raffia “reeds”
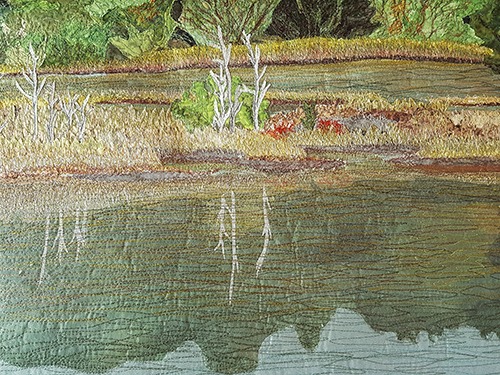
COMPLETED ARTWORK
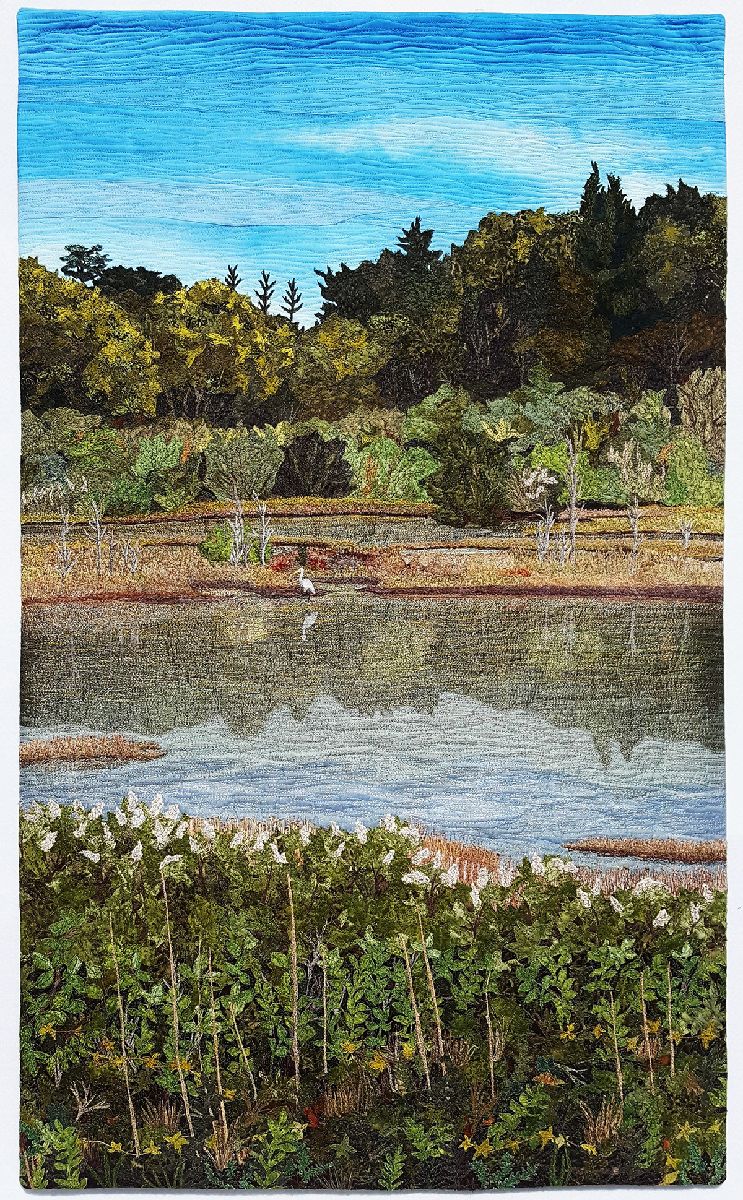
For more details about Susan and her work, please visit her website at https://susanpolansky.com.
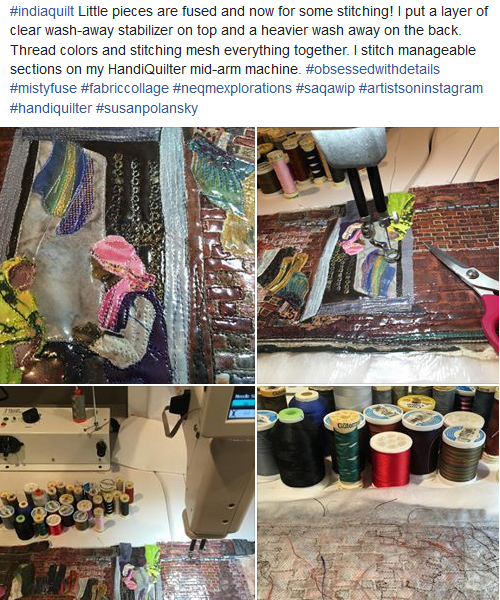
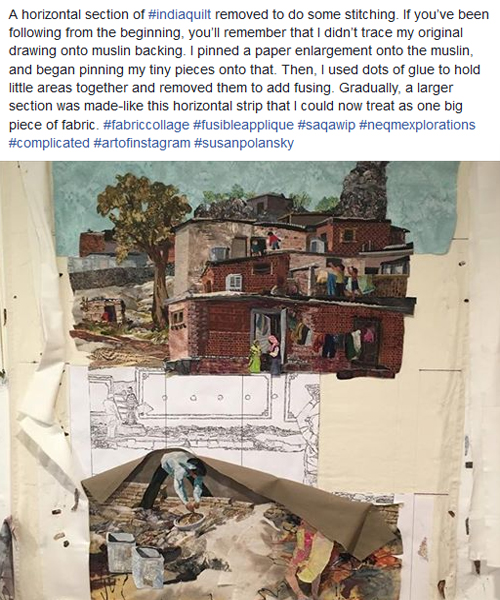
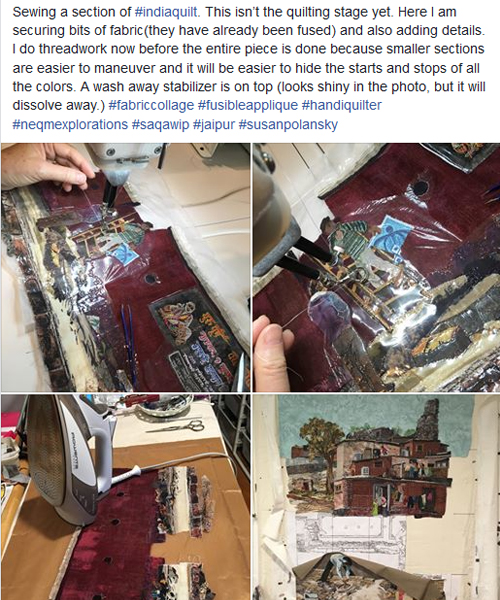
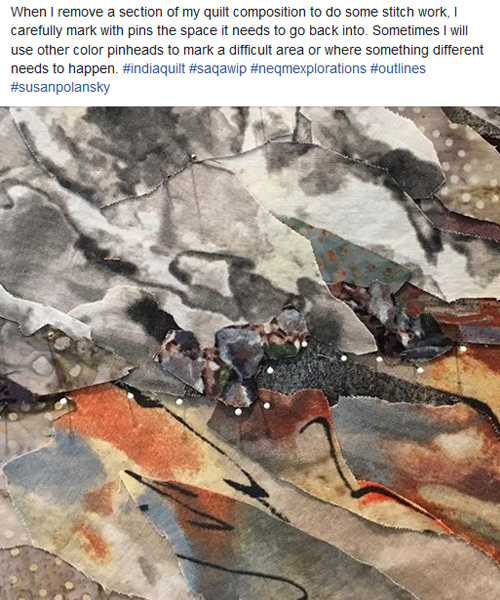
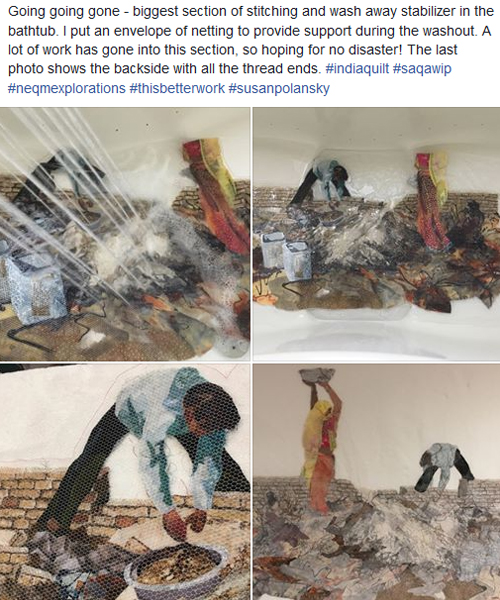
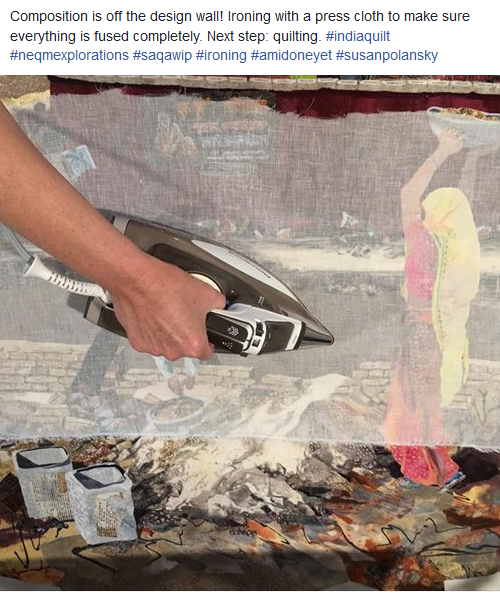
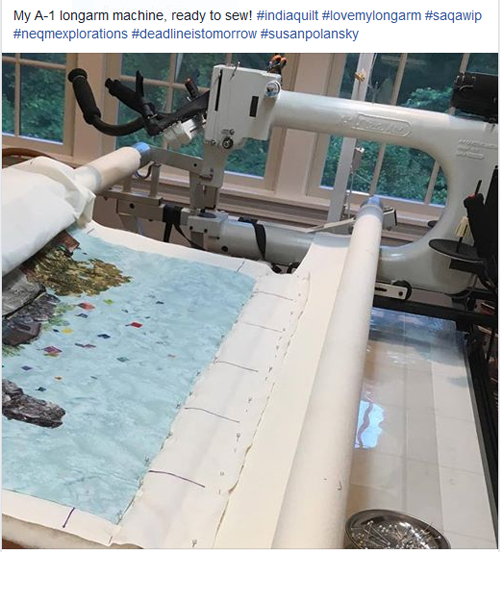
DESIGN PROCESS
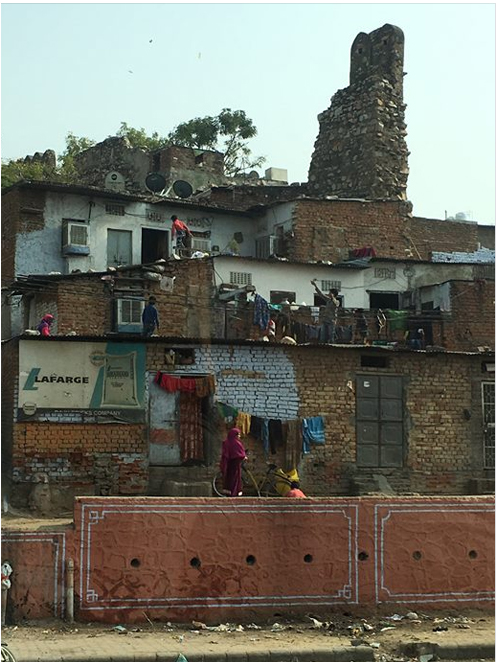
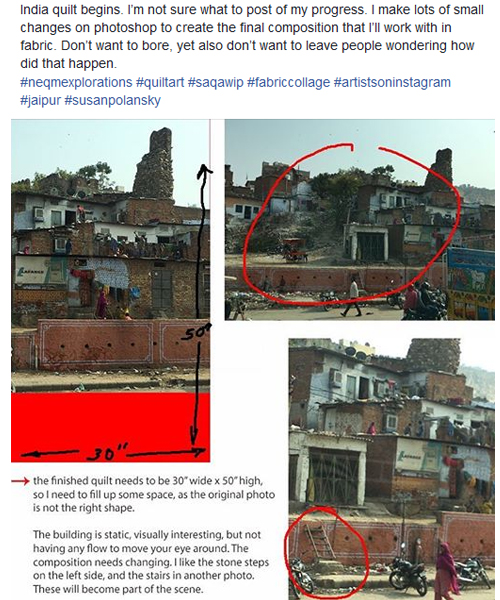
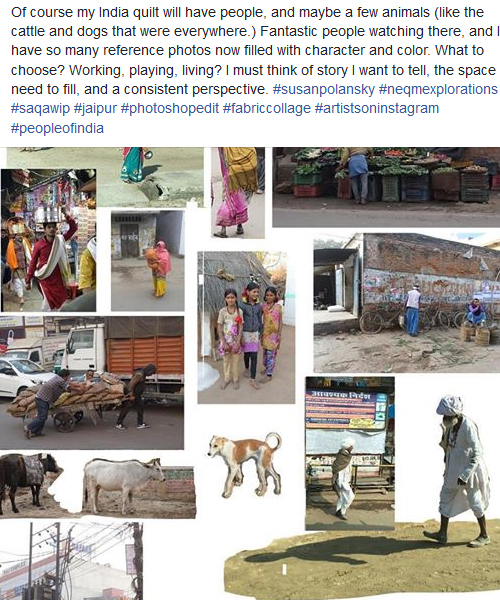
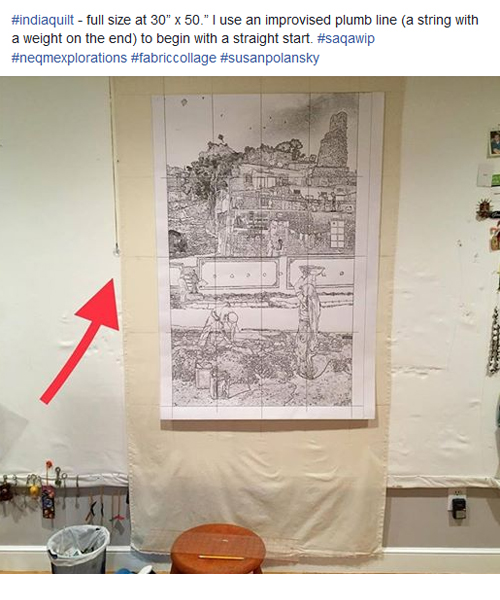
Here's my starting place, a photo from my recent trip to India.


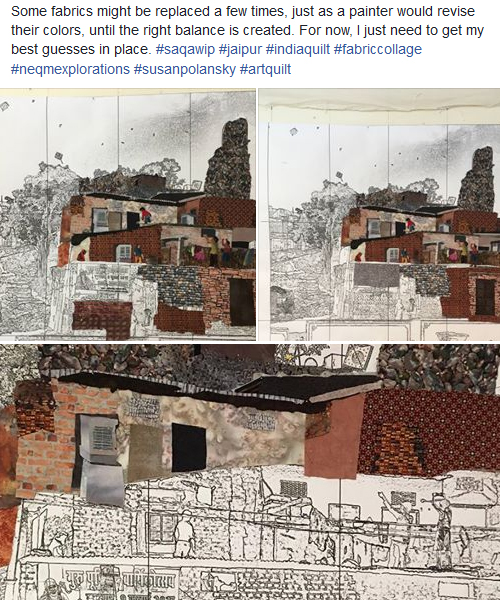


COMPLETED ARTWORK
.jpg)
For more details about Timna and her work, please visit her website at http://www.timnatarr.com/
DESIGN PROCESS
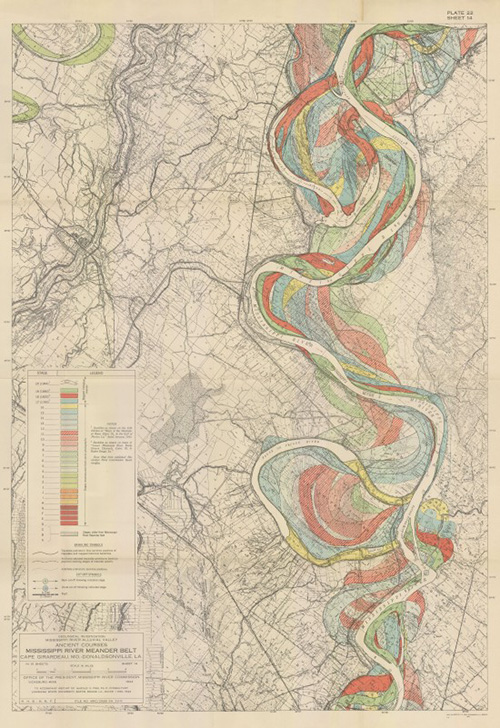
1. Original 1944 Army Corp of Engineers map showing a section of the Mississippi River and how its course has changed over time.
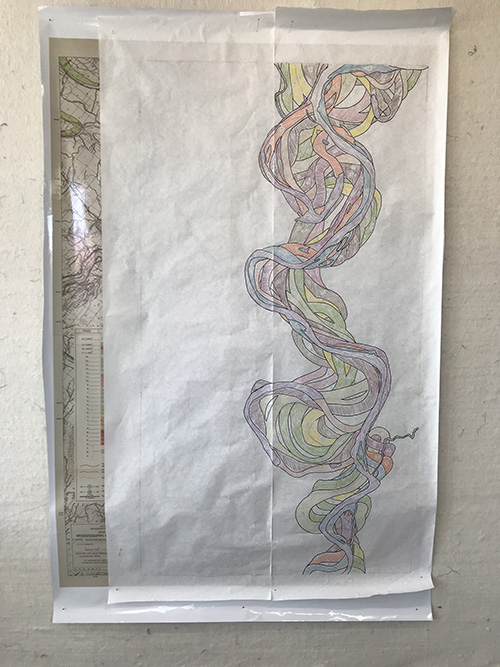
2. The original map is printed, on vinyl, to the finished size of the quilt. I then draw a pattern on paper.
.jpg)
2.5. The paper pattern in then cut into sections to make freezer paper templates. Each color of fabric has a corresponding number, so I can keep track of where everything belongs. The fabric pieces are then sewn together by hand.
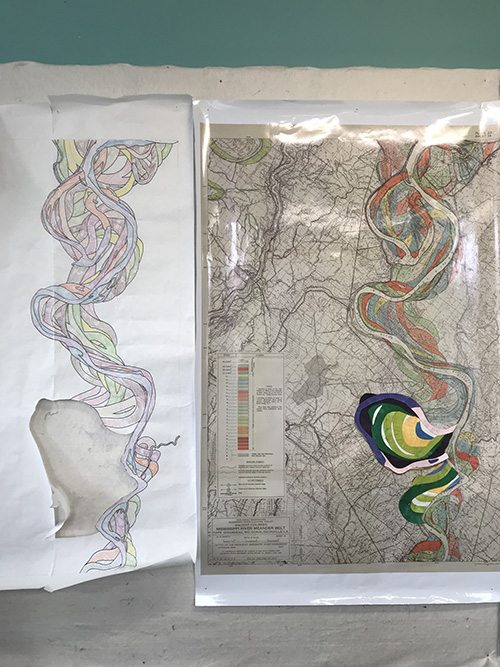
3-5 As smaller sections of the applique are finished, I lay them out on the original map, so I can keep track of how all of the pieces fit together.
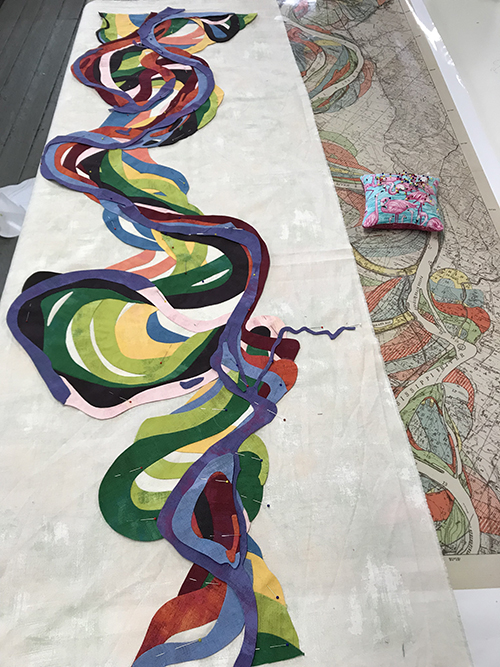
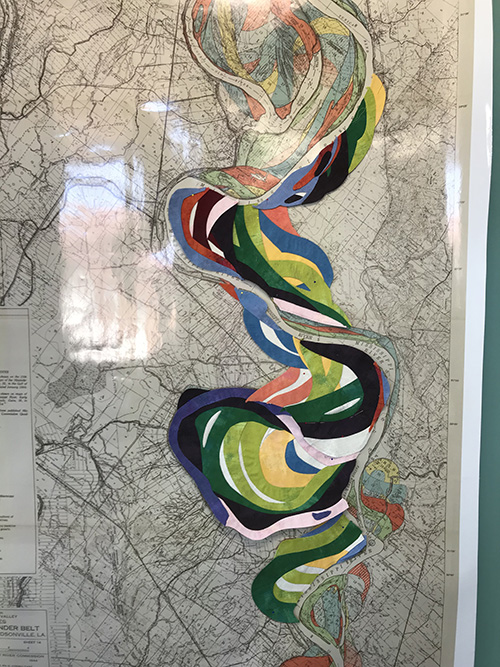
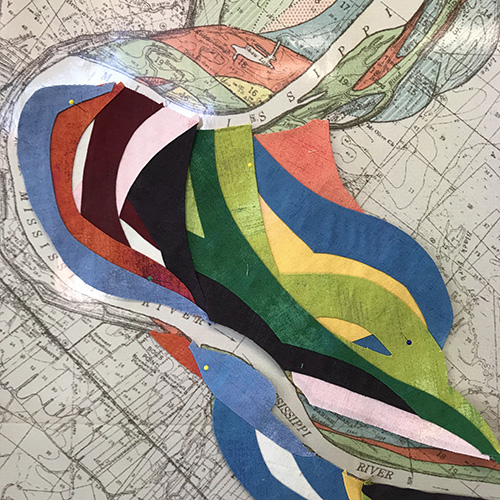
6. After all of the appliqued sections are complete, I lay them out on the background fabric. Then I sew the sections together and applique the entire piece to the background fabric. After everything is sewn together, I cut the background fabric out from behind the appliqued pieces and pull out the freezer paper templates.
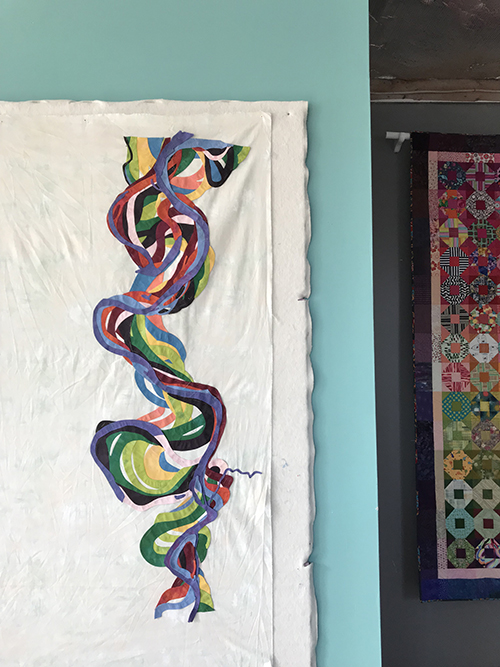
7. The top of the quilt is finished, ready to be quilted.
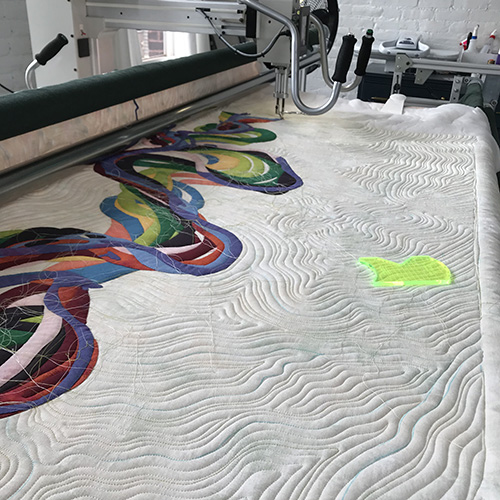
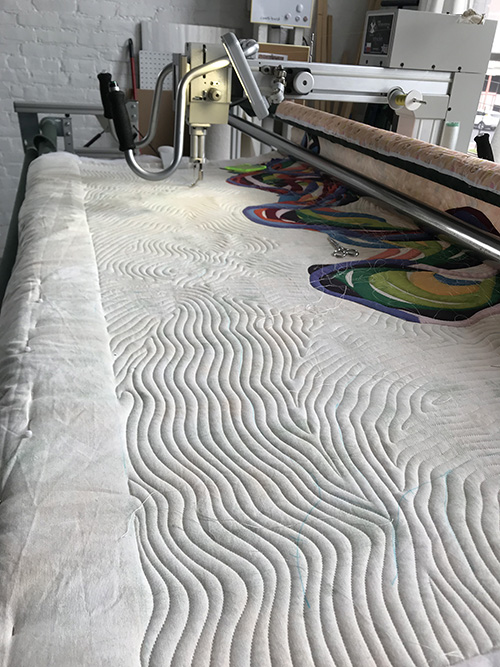
8-9. Quilting takes place on my longarm machine. This is the first time I use a sewing machine during process. The topographical lines of the original map are the inspiration for the quilted lines.
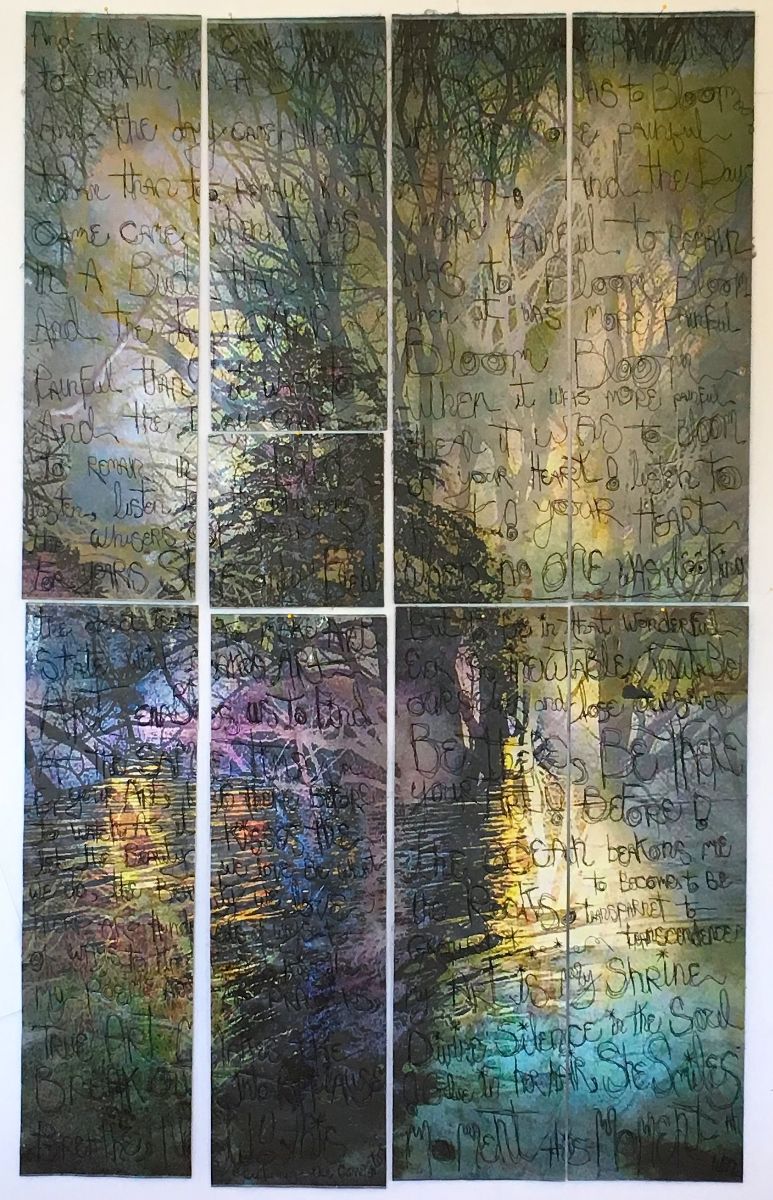
FINAL IMAGE
Mississippi Meander II (Photo by Stephen Petegorsky)
For more information about Wen and her artwork, please visit her website at: http://www.wenredmond.com/
Wen also has a DVD about her process, available here.
DESIGN PROCESS
Techniques:
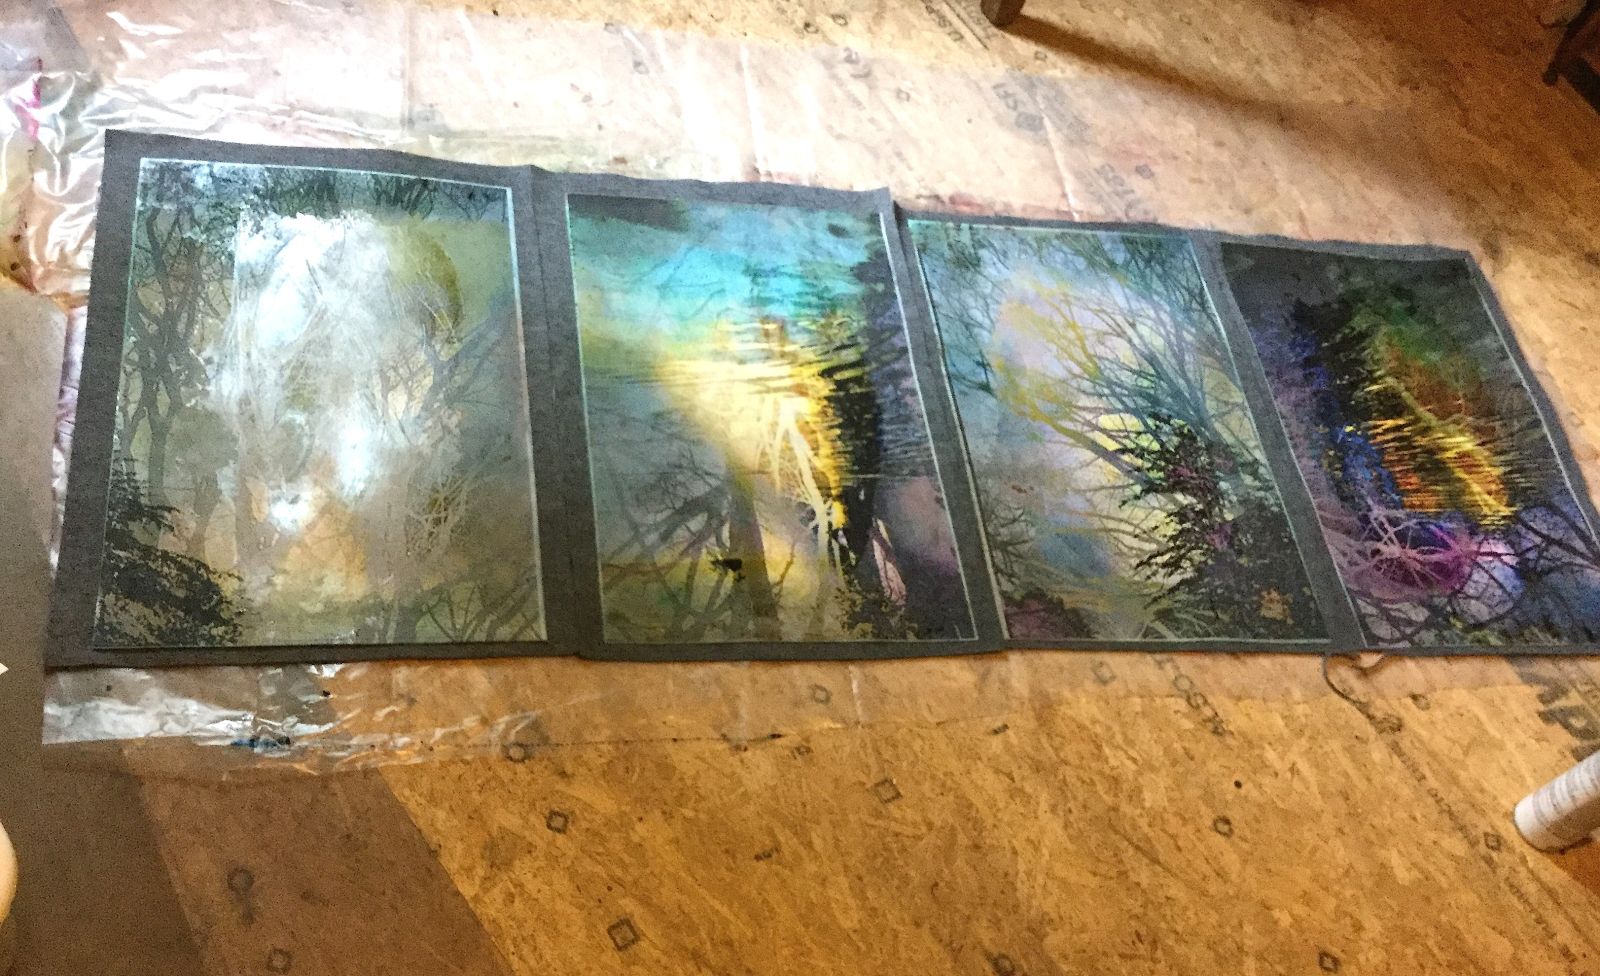
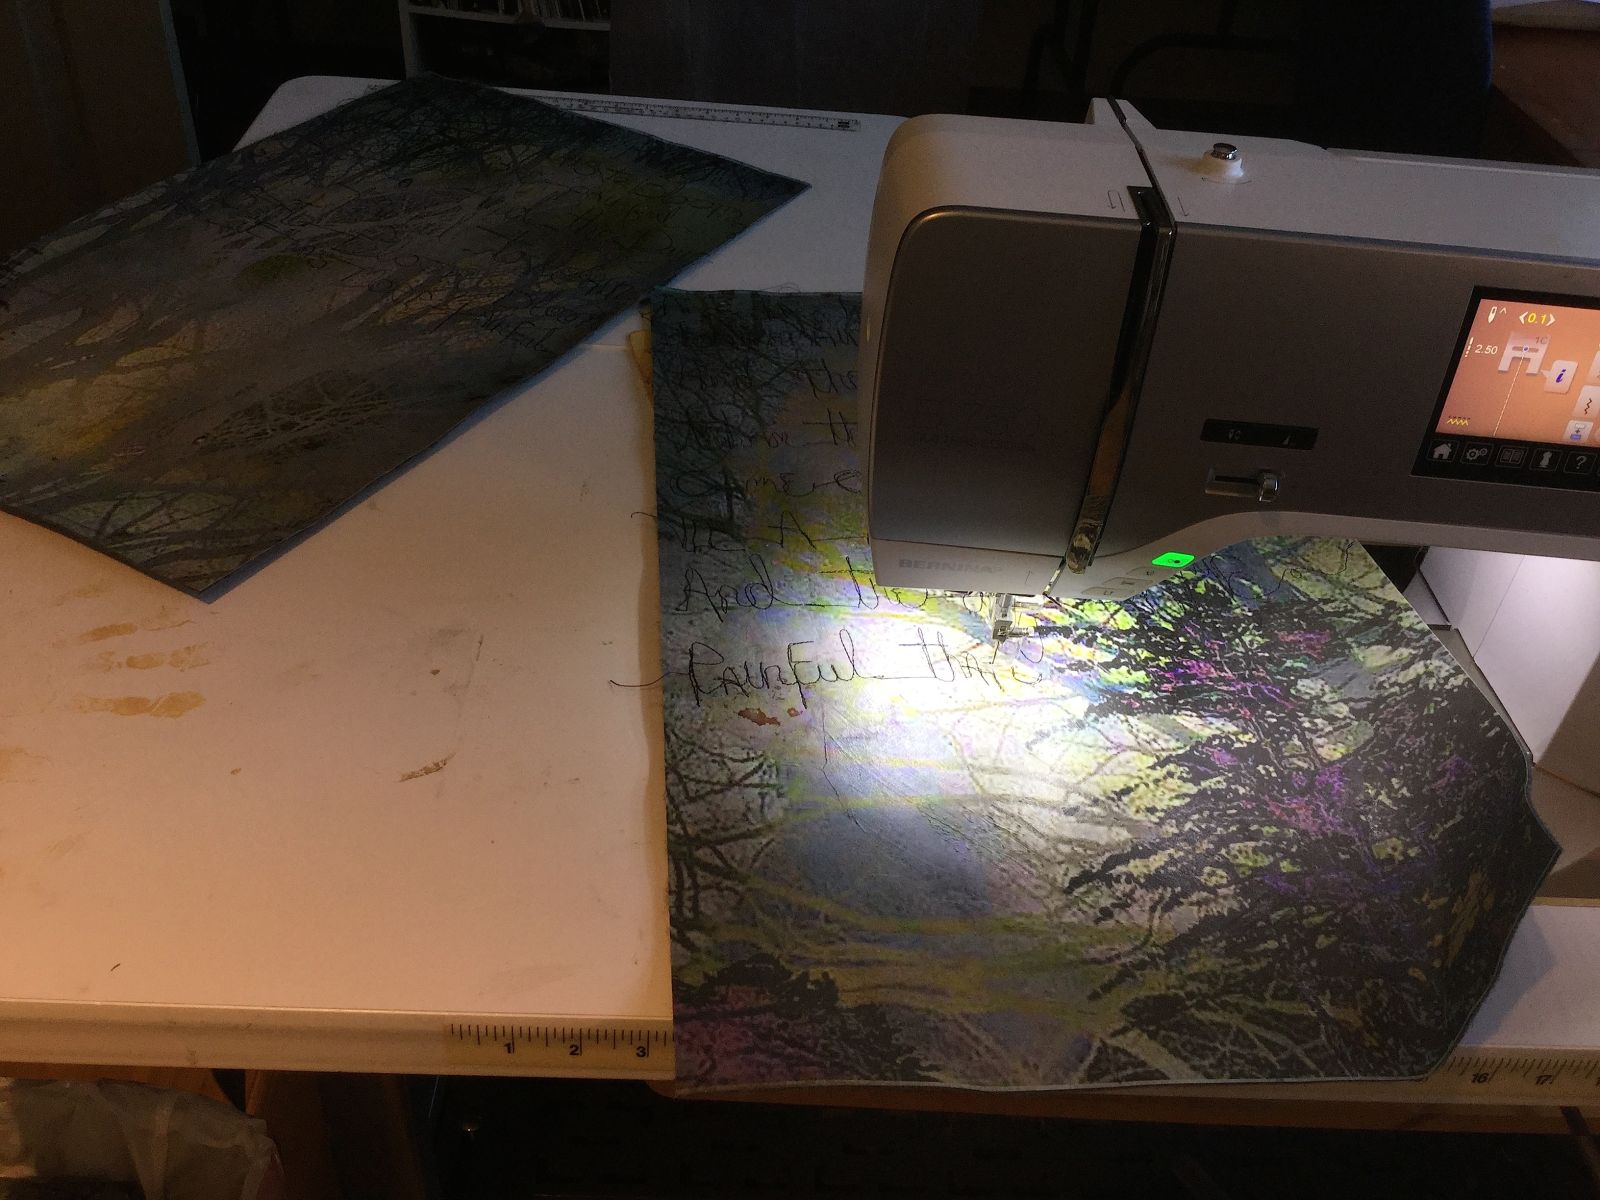
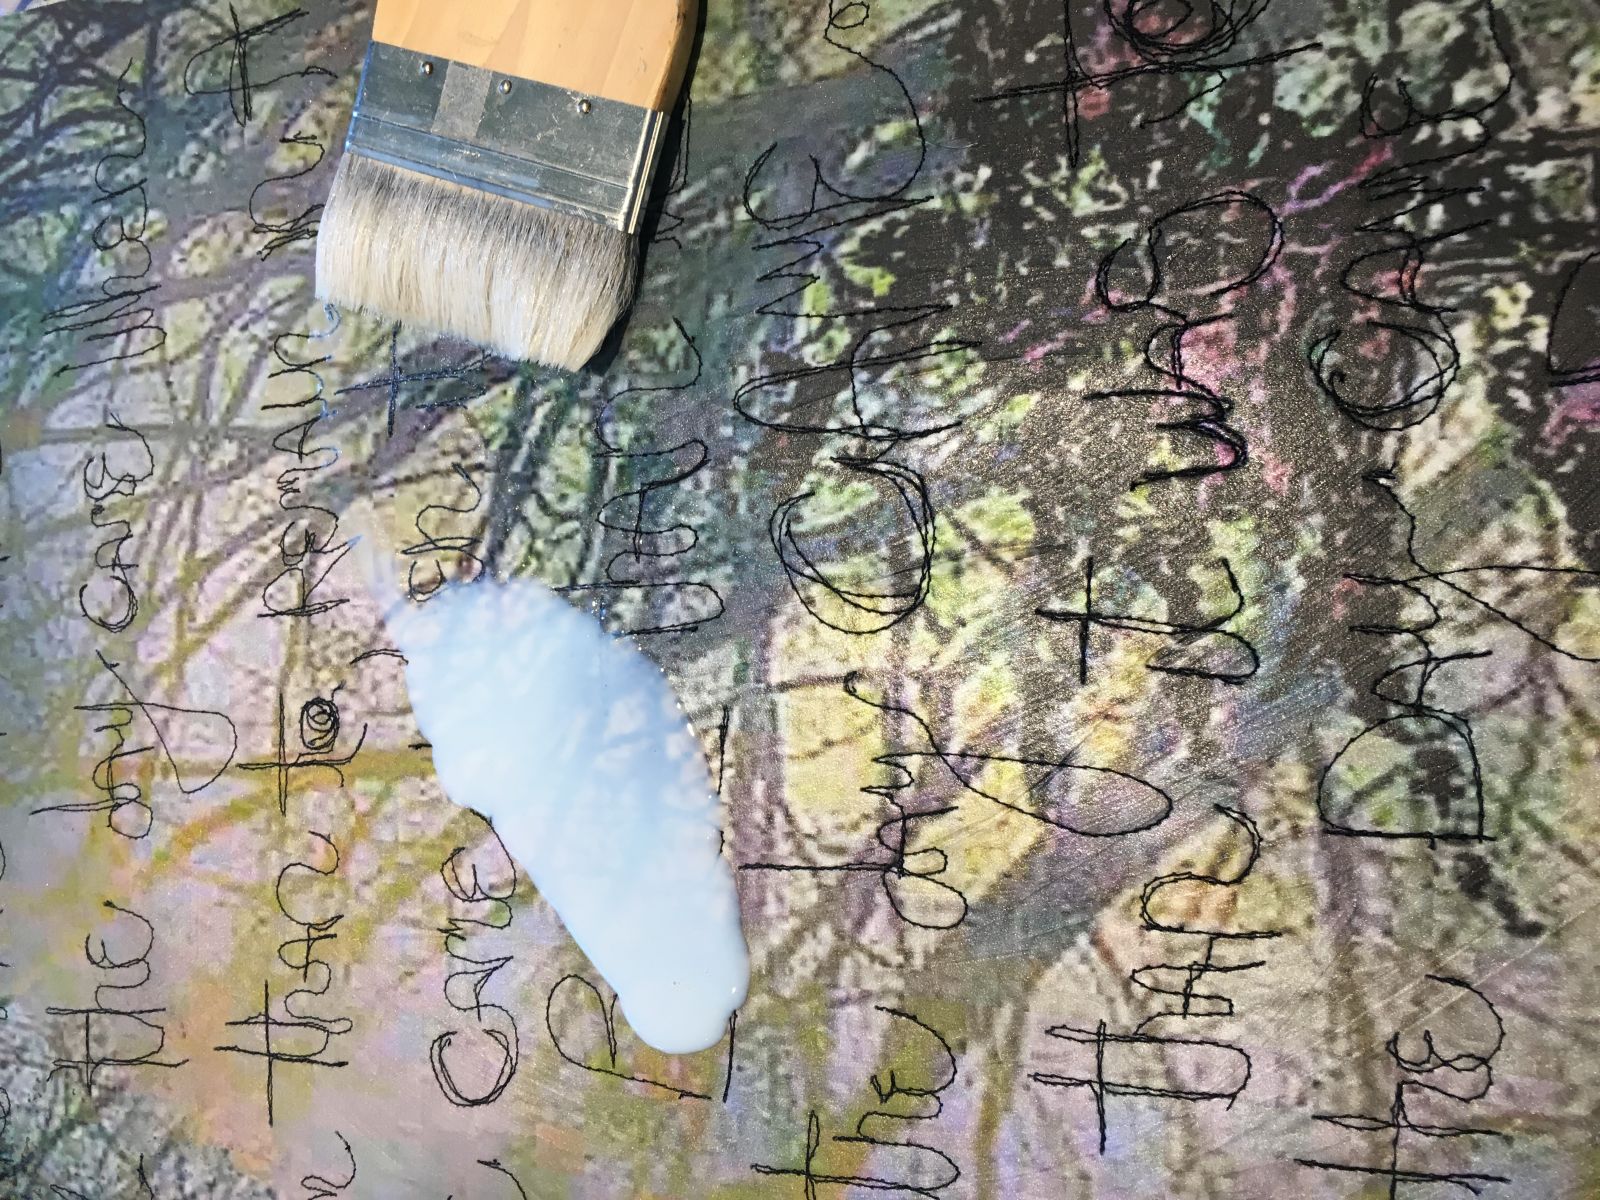
Molding paste applied to interfacing substrate, textured, digitally prepared with inkAid digital grounds, and printed in sections to create a larger finished photograph. This is quilted and cut into segments. Each segment is edge stitched, sealed with paint and hand-tied together with pearl cotton. The entire piece is protected with varnish.
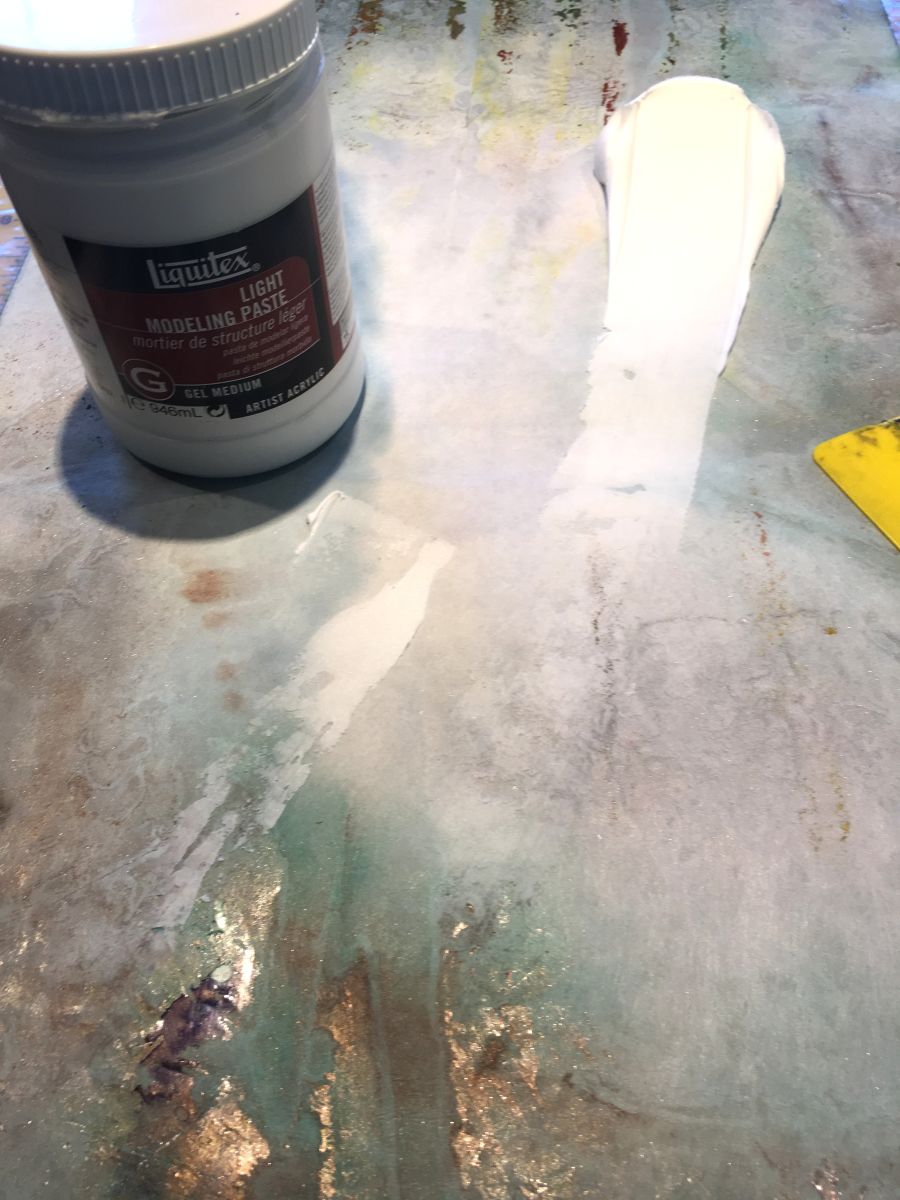
Spreading Molding Paste
Fused to acrylic felt ‘batting’ and sprayed with Krylon UV Resistant spray.
Deciding on quilting by using clear plastic. Drew design on the plastic and overlaid on image for quilting evaluation
A second protective coat of diluted Satin Varnish was applied after quilting
Dried piece was trimmed into smaller segments to create a segmented quilt with interior design
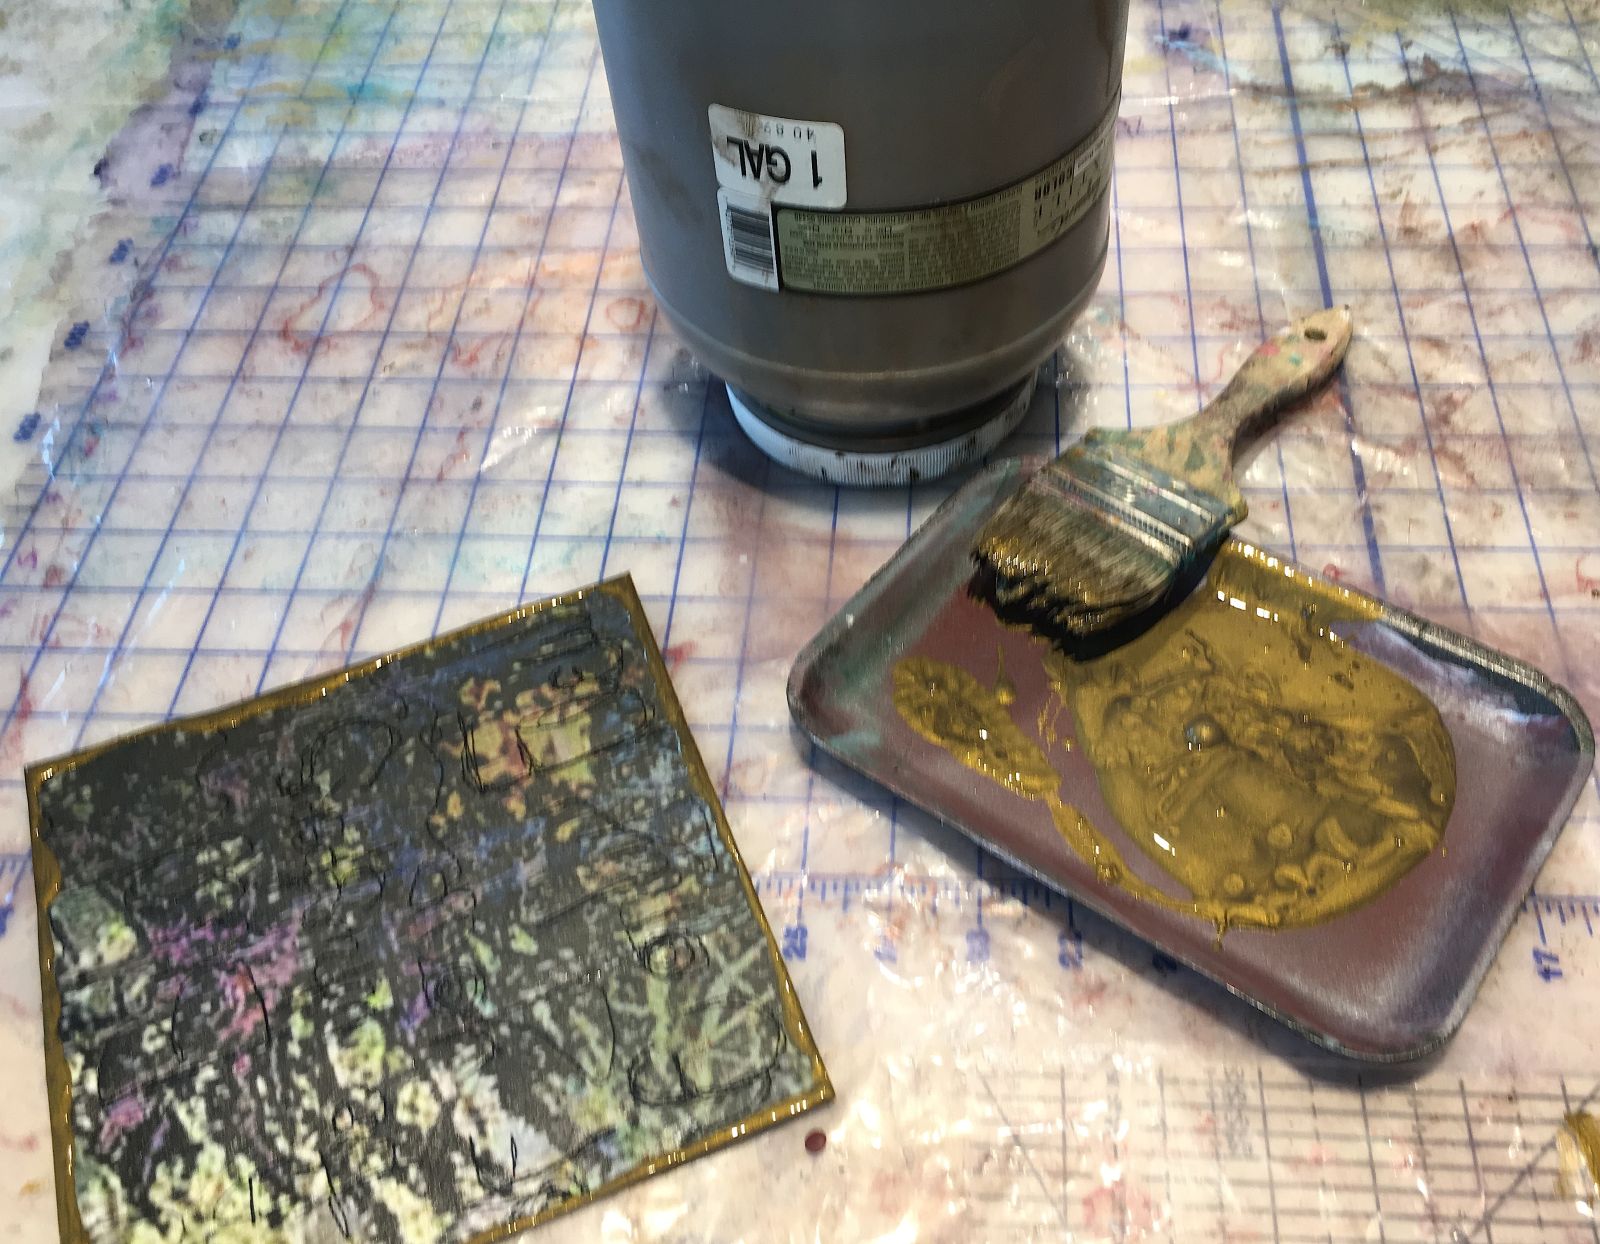
Painting edges instead of binding for a neat decorative edge seal

Adding specialty mediums to highlight
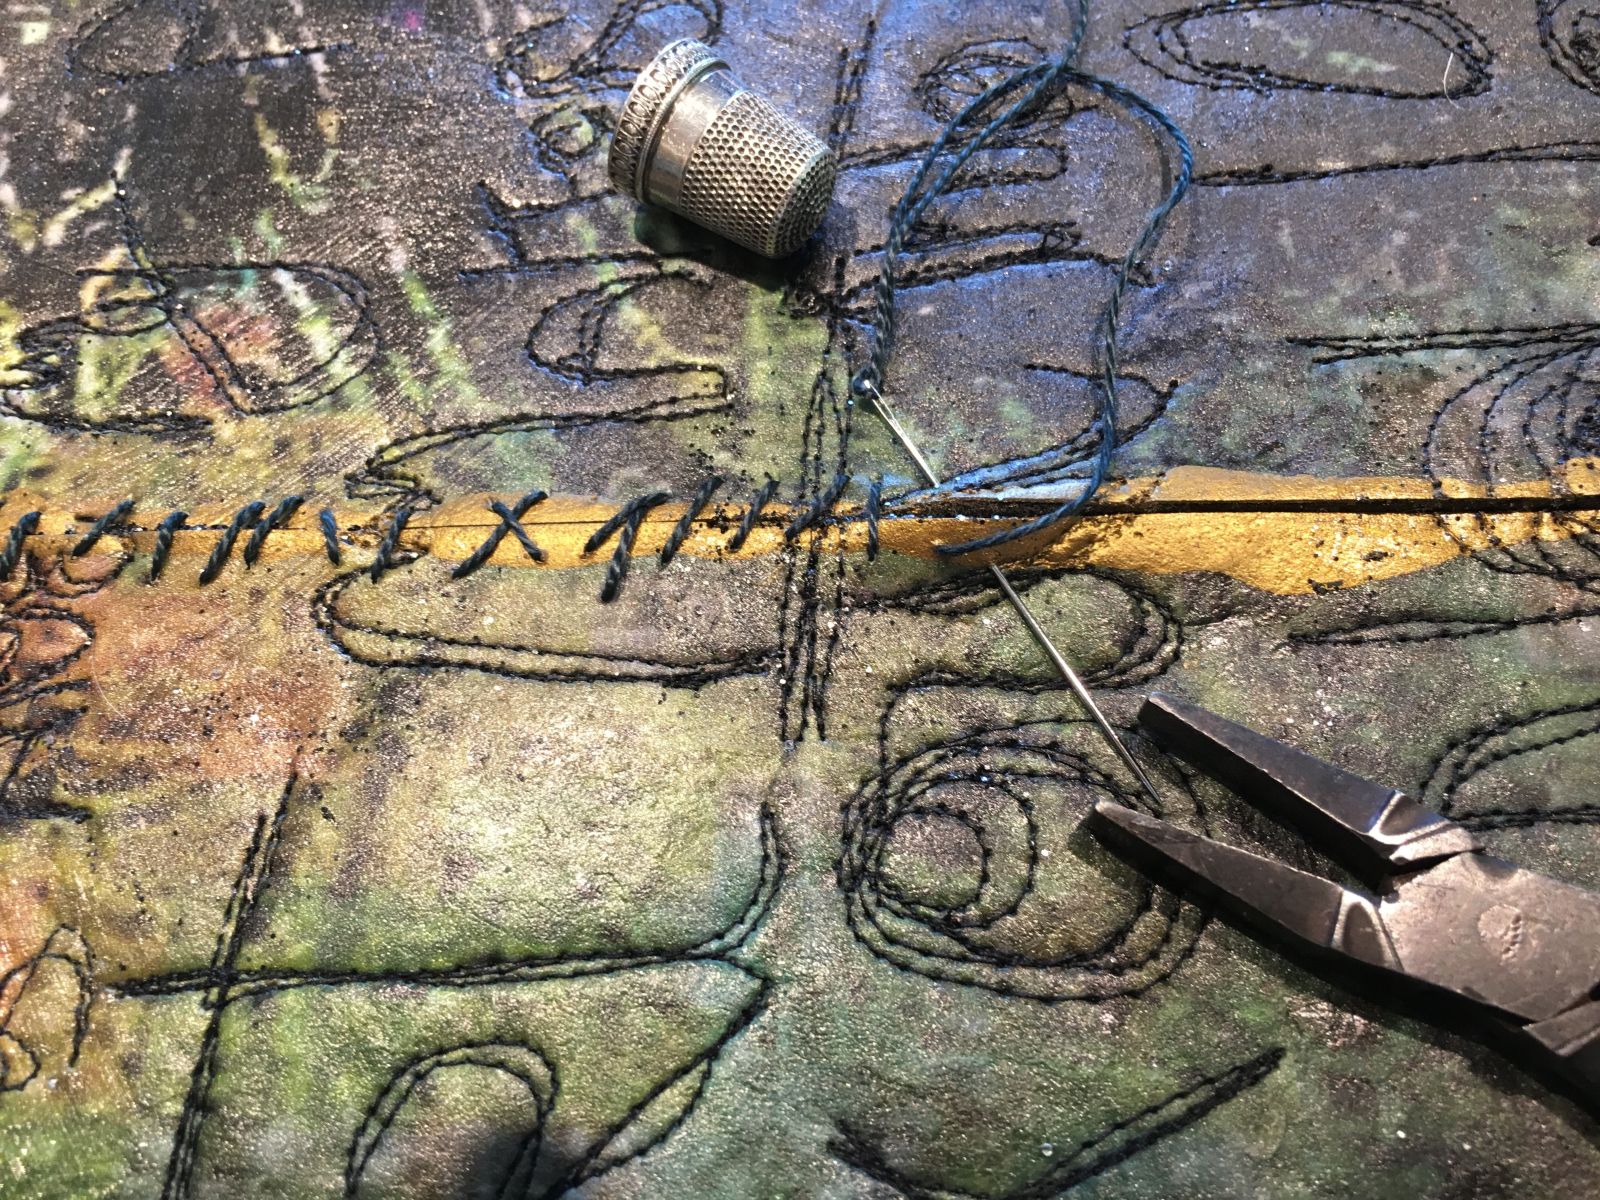
Sewing dried segments together
For more information about Sarah and her artwork, please visit her website at: https://www.sarahannsmith.com/
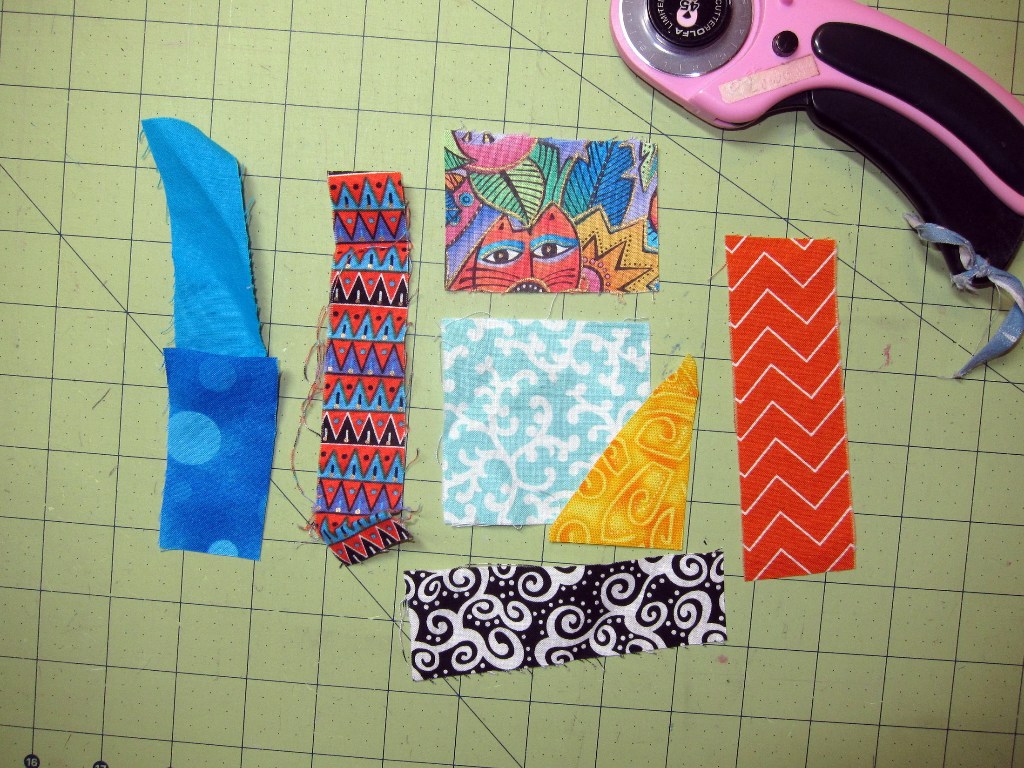
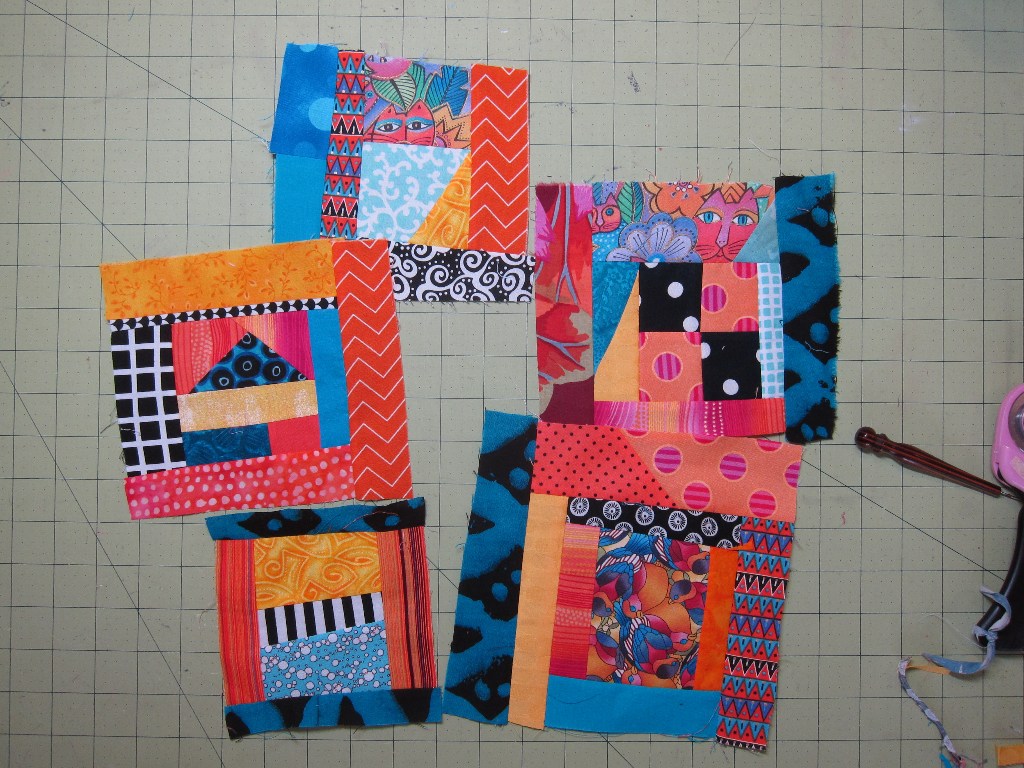
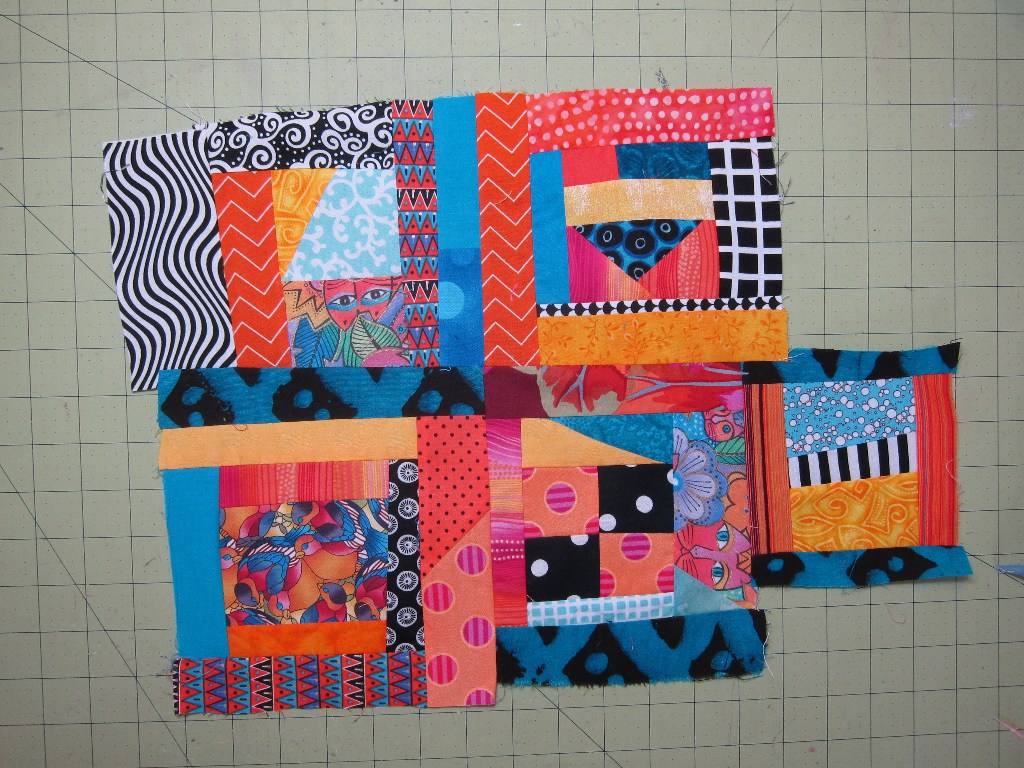
DESIGN PROCESS
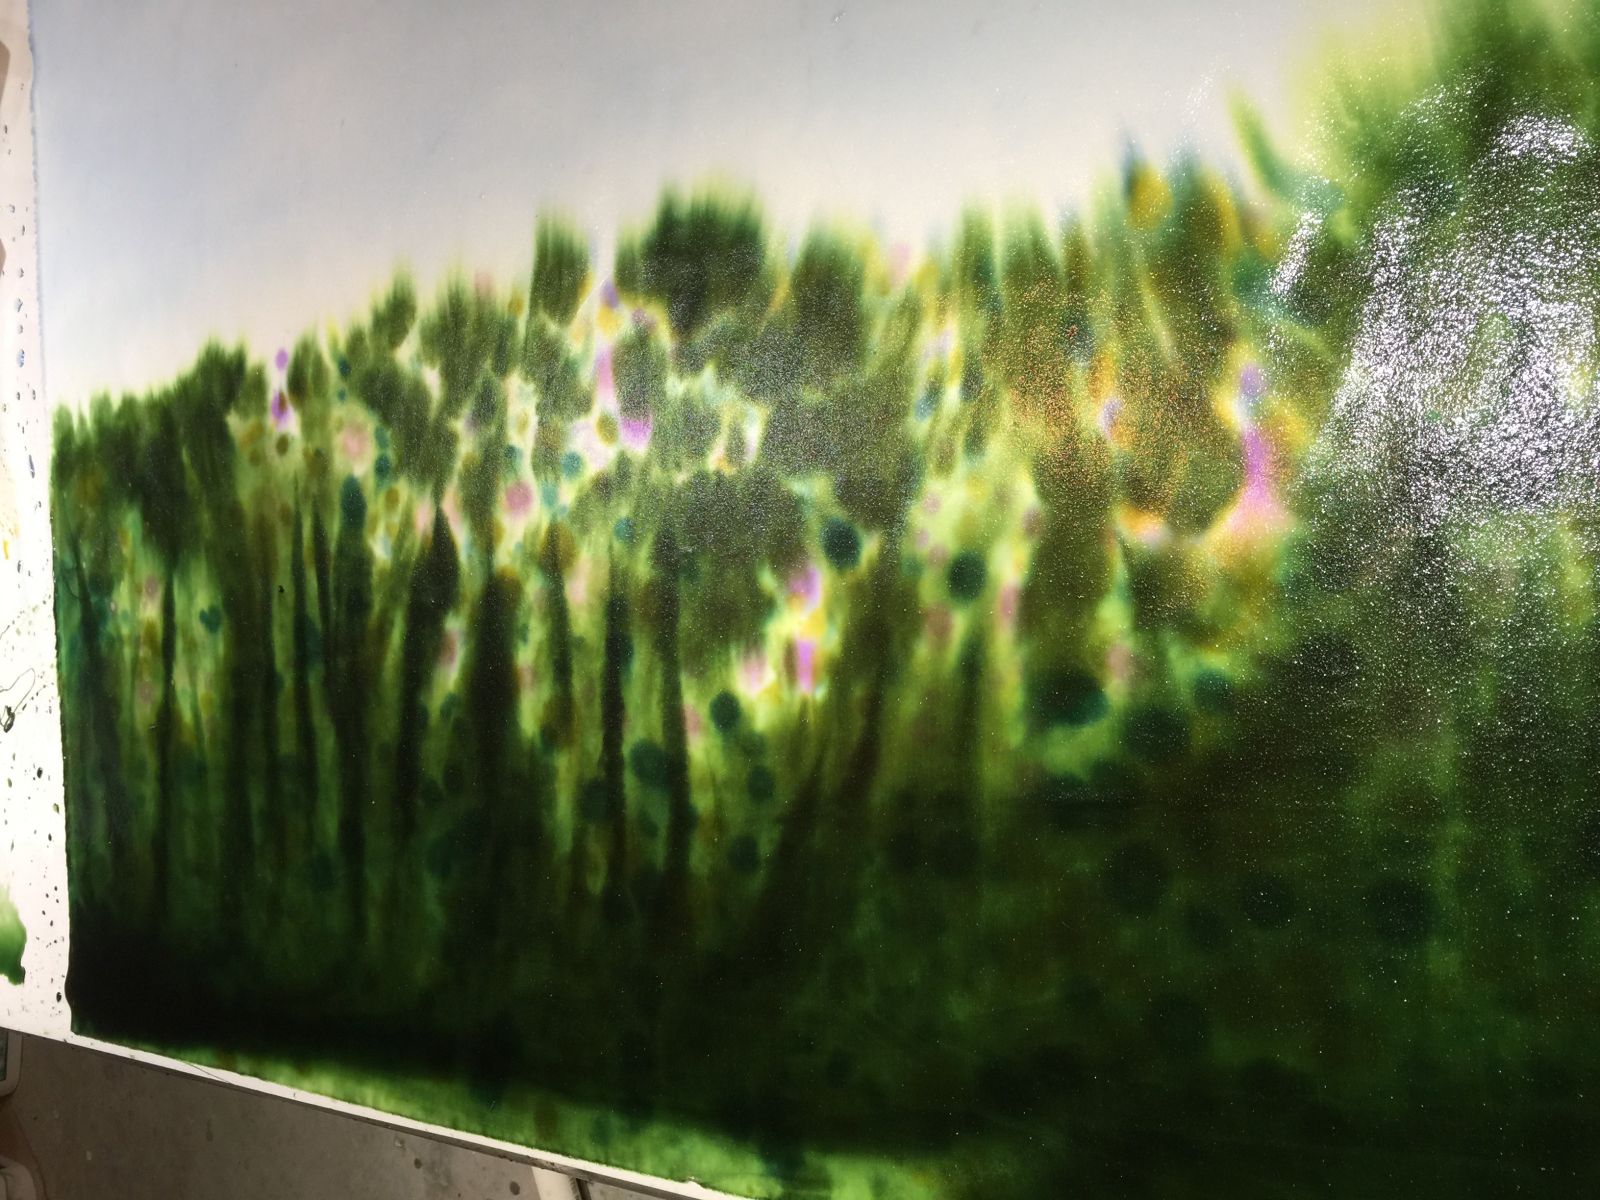
Although I still use commercial batiks in my work, fabrics I have dyed myself play an increasingly important role. For this piece, I wanted to simulate the blurriness in a photograph that has a shallow depth of field; the blurriness helps create a sense of depth and emphasizes the focal point. I wasn’t sure if I could pull it off. Here, I have prepared my white fabric with soda ash, then painted on dots for the pink and purple flowers, then added greens for the dense foliage and weeds. Overnight, the color seeped up into the blue in the still-wet fabric on my dye table. Once the fabric was washed and dried, the sky was too pale, so I then over-dyed the top and where the yellow dye had wicked up into the lower portion of the sky.
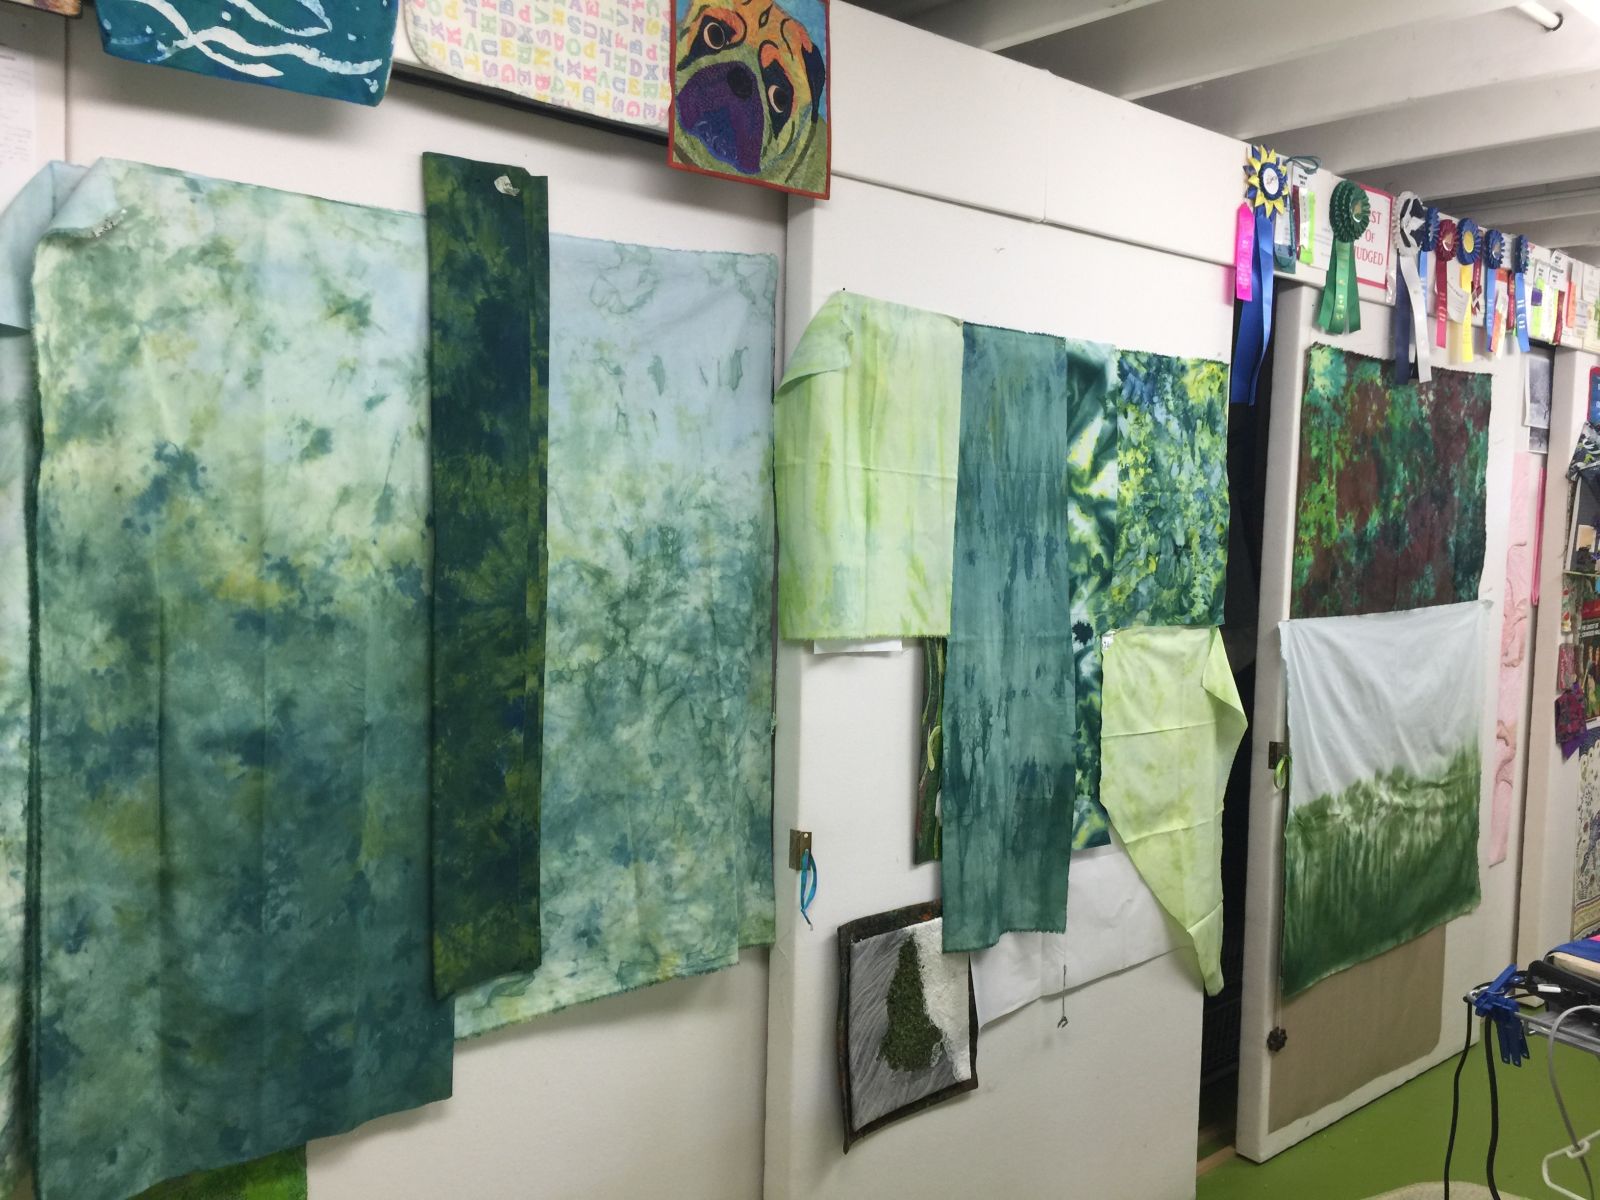
After fabrics are washed and dried, I pin them up on my design wall in my basement studio. When we moved to this house, the space was a big, dark, unfinished room. I created a closet along the entire side wall and designed the sliding doors which a carpenter built using rigid foam core and wood. Being able to pin the fabrics up lets me determine what fabrics will work, what needs overdyeing, and what gaps there may be.
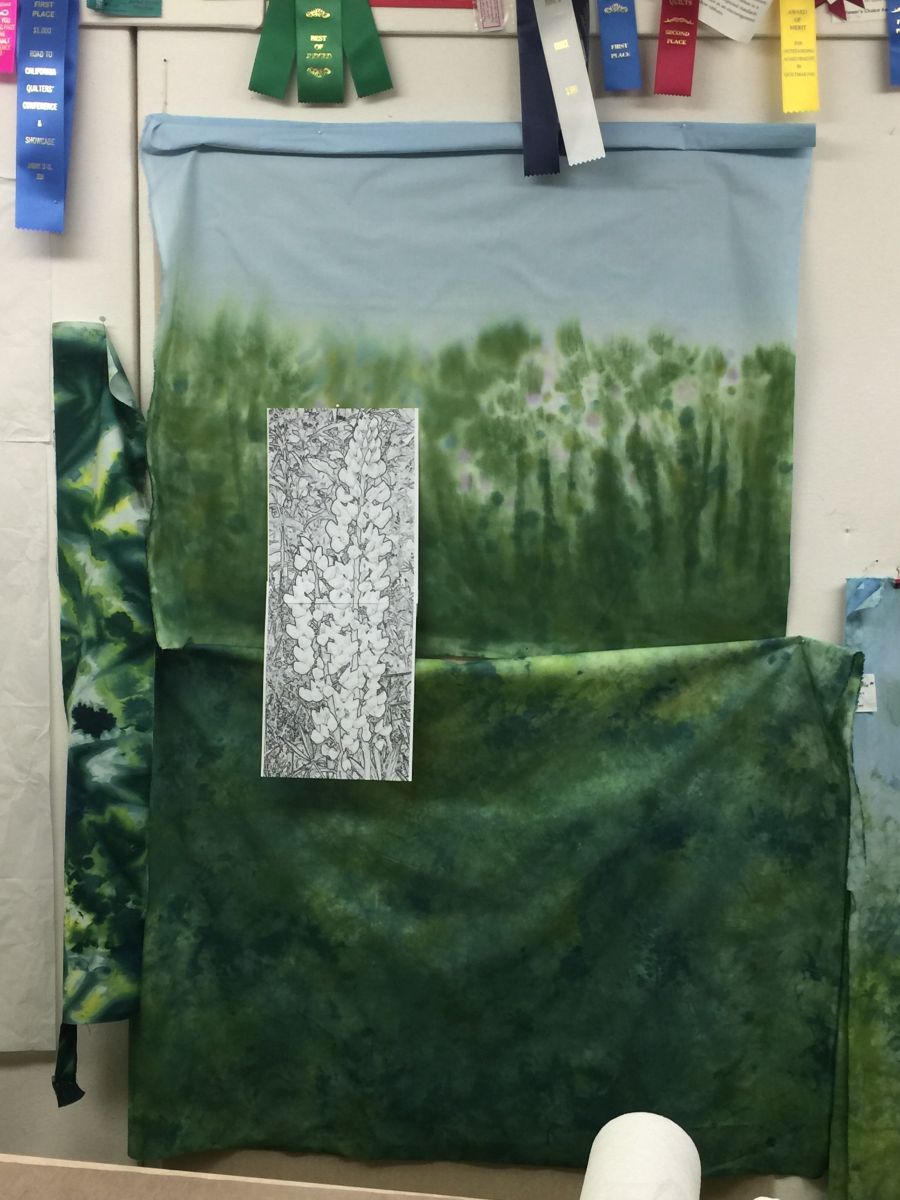
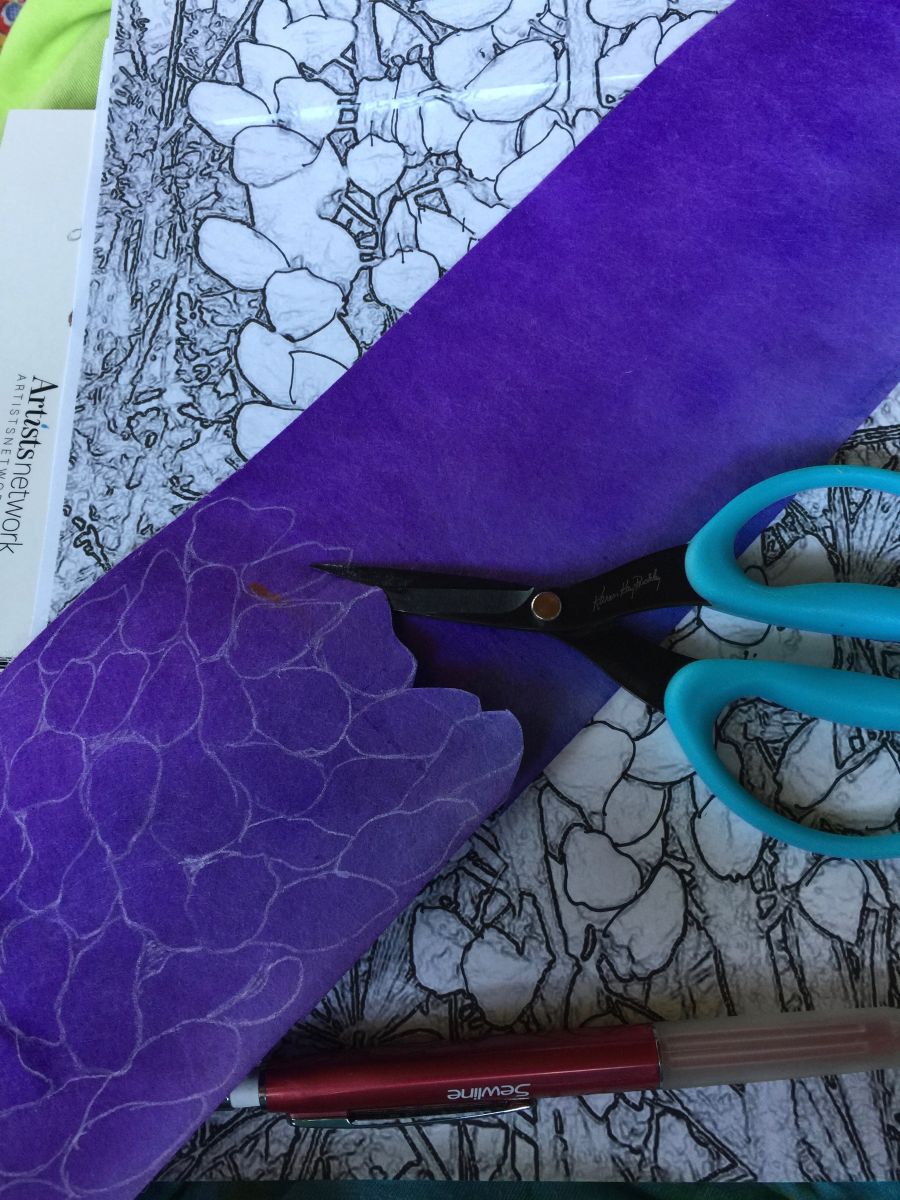
Sometimes I create a detailed sketch before the dyeing and fabric selection phase. Other times, as with this piece, I have reference photos that I have taken, but take a more improvisational approach. Here I have pinned up my upper background fabric and a dyed fabric that will be one of many used in the lower background and leaves. In Photoshop, I converted one of my photos to a black and white line drawing/outline, then enlarged it before printing onto two sheets of paper. I taped those together to see if the size and scale was correct. This time it was, but sometimes it takes a couple attempts to get it right. This pattern is my guide for size and shape when drawing and cutting the lupine petals.
Small pieces of fabric tend to fray a lot and can be irksome. I decided to try painting sturdy interfacing—the heavyweight used in a tailored shirt or jacket—then applying fusible to the back prior to cutting out petals. I used ProSilk paint which has the consistency of liquid ink, and tried to get a variety of values (light vs. dark). Even though the mind registers that the petals of a flower are one color, in fact they vary a lot because of how the light hits them. Having a variation in the petals makes the resulting flowers more, rather than less, lifelike.
When starting a new piece, I select fabrics, both my own hand-dyes and commercial batiks. I always select more than I think I will use. Some of the fabrics already have fusible on the back, from previous projects, but I always end up fusing new fabrics as well. As I start constructing the piece, some fabrics are quickly rejected as too yellow, too busy/high contrast, too colorful, not a harmonious tone.
As soon as the interfacing was nearly dry, I ironed it dry which helps set the color, then applied MistyFuse adhesive web to one side of the interfacing. On one large purple piece, I cut it in half and applied the fusible to one side of one half, and the other side of the second half. It took 11 days of marking, cutting and fusing to create the bazillion petals required for nine lupines. Eleven. DAYS. Hours. And. Hours. Of cutting.
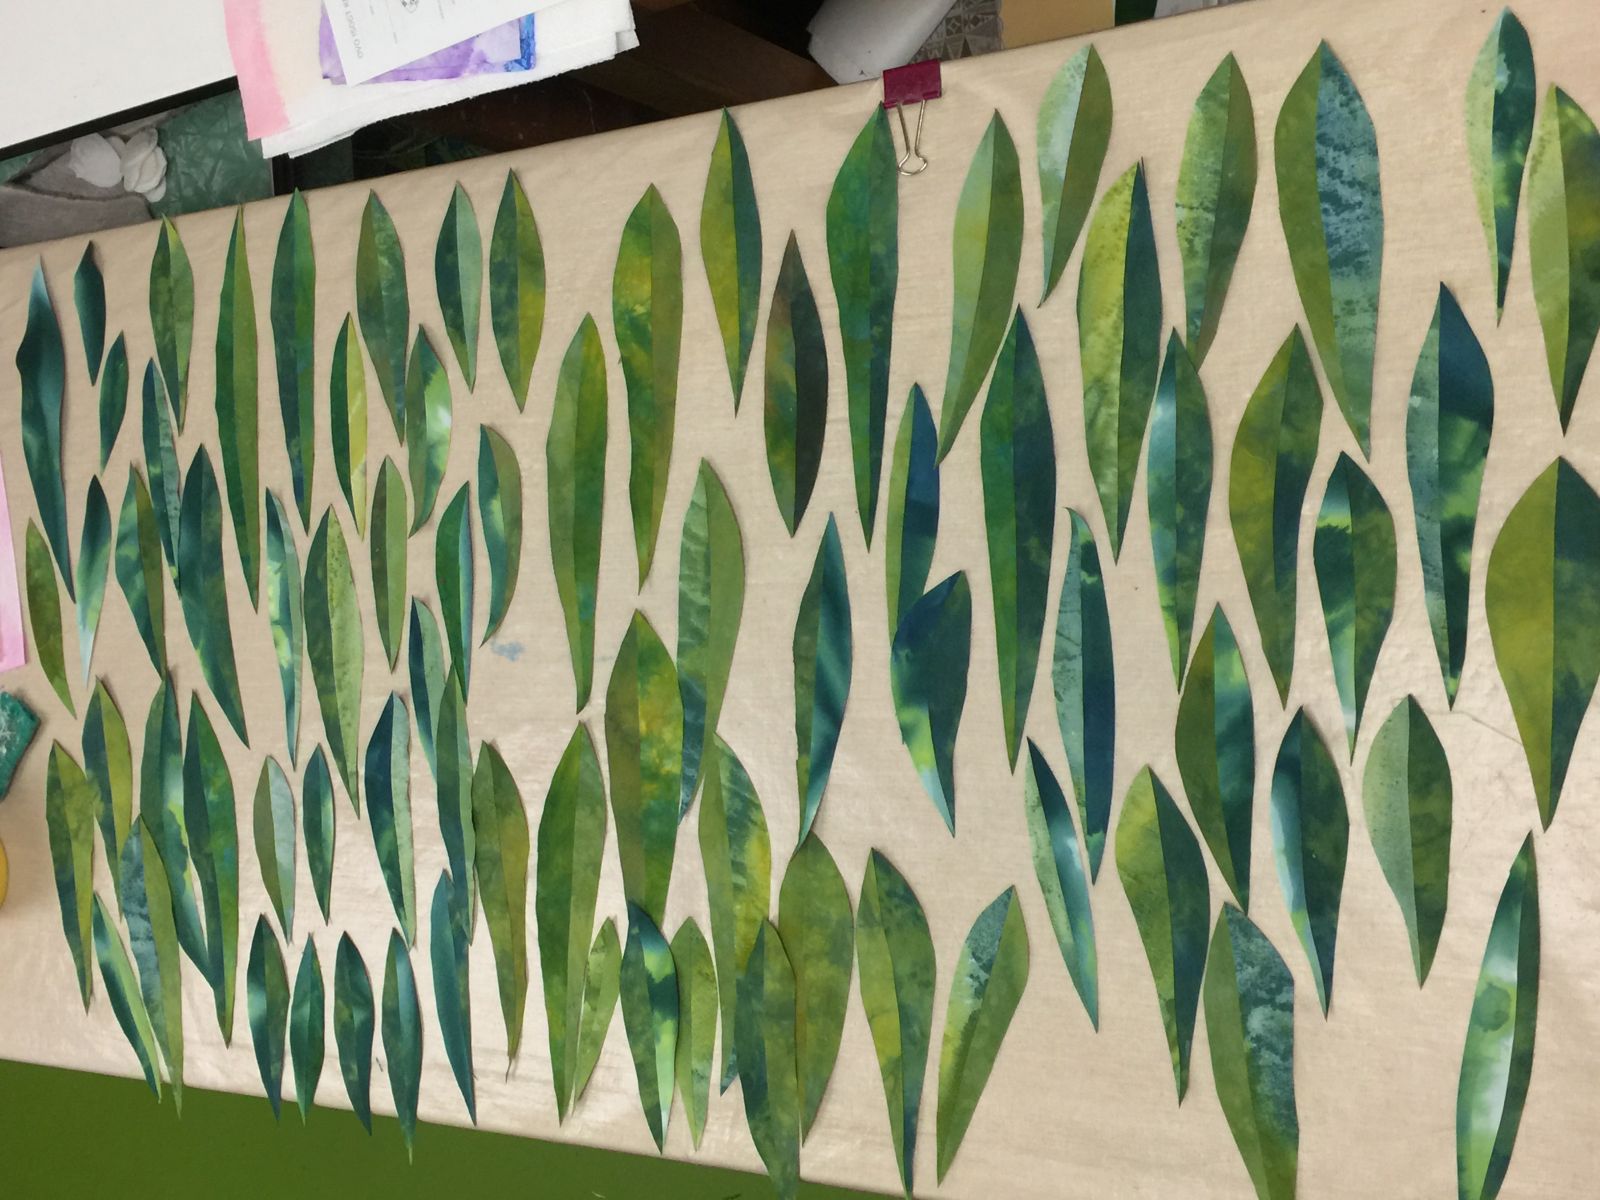
While I was doing all that endless cutting, I also did something that moved faster: cutting the pre-fused background foliage fabrics for the lower portion of the quilt. These fabrics have more detail the closer you get to the foreground, just as the eye can distinguish more detail in nearby objects. I cut large chunks with my “wad and chop” technique (open scissors, wad and gather fabric into opening, move second hand away, and chop creating a jaggedy edge), then stacked these chunks by fabric. These are placed on the ironing board next to my design wall so I can turn around, grab a piece, and add it to the composition.

Looking at my reference photos which I keep pinned nearby, I look at which areas are in shadow, which are lighter, and how much detail you can identify. I make sure that there is a good distribution in the fabrics, and that the same fabric doesn’t touch another chunk of the same too much. In the top photo, you can see the tan color of the 3x6 foot non-stick press sheet on my design wall. I don’t use a base fabric—I just fuse directly to the non-stick sheet. That way, if I don’t like it, it is easy to peel off the fabric and try another. In the second photo, I have filled in most of the foreground. I don’t seal down the edges, though, because I will want to tuck in the tall stems and some lupine leaves behind the clumps of wild grasses and weeds.
My ironing surface is 22x60” and is covered with another huge non-stick press sheet. My black and white outline printout is on the right for reference on how the petals cluster on the stalk, photos of several different lupines which show more space between the tiers, are just to the left of the ice cube tray. The ice cube tray helps me sort small bits. This time I had petals ranging from small to large and in darker or lighter values, as well as some white and pink ones. A full ice cube tray would make about two lupines. More cutting. Then MORE cutting. A cutting machine may be in my future.
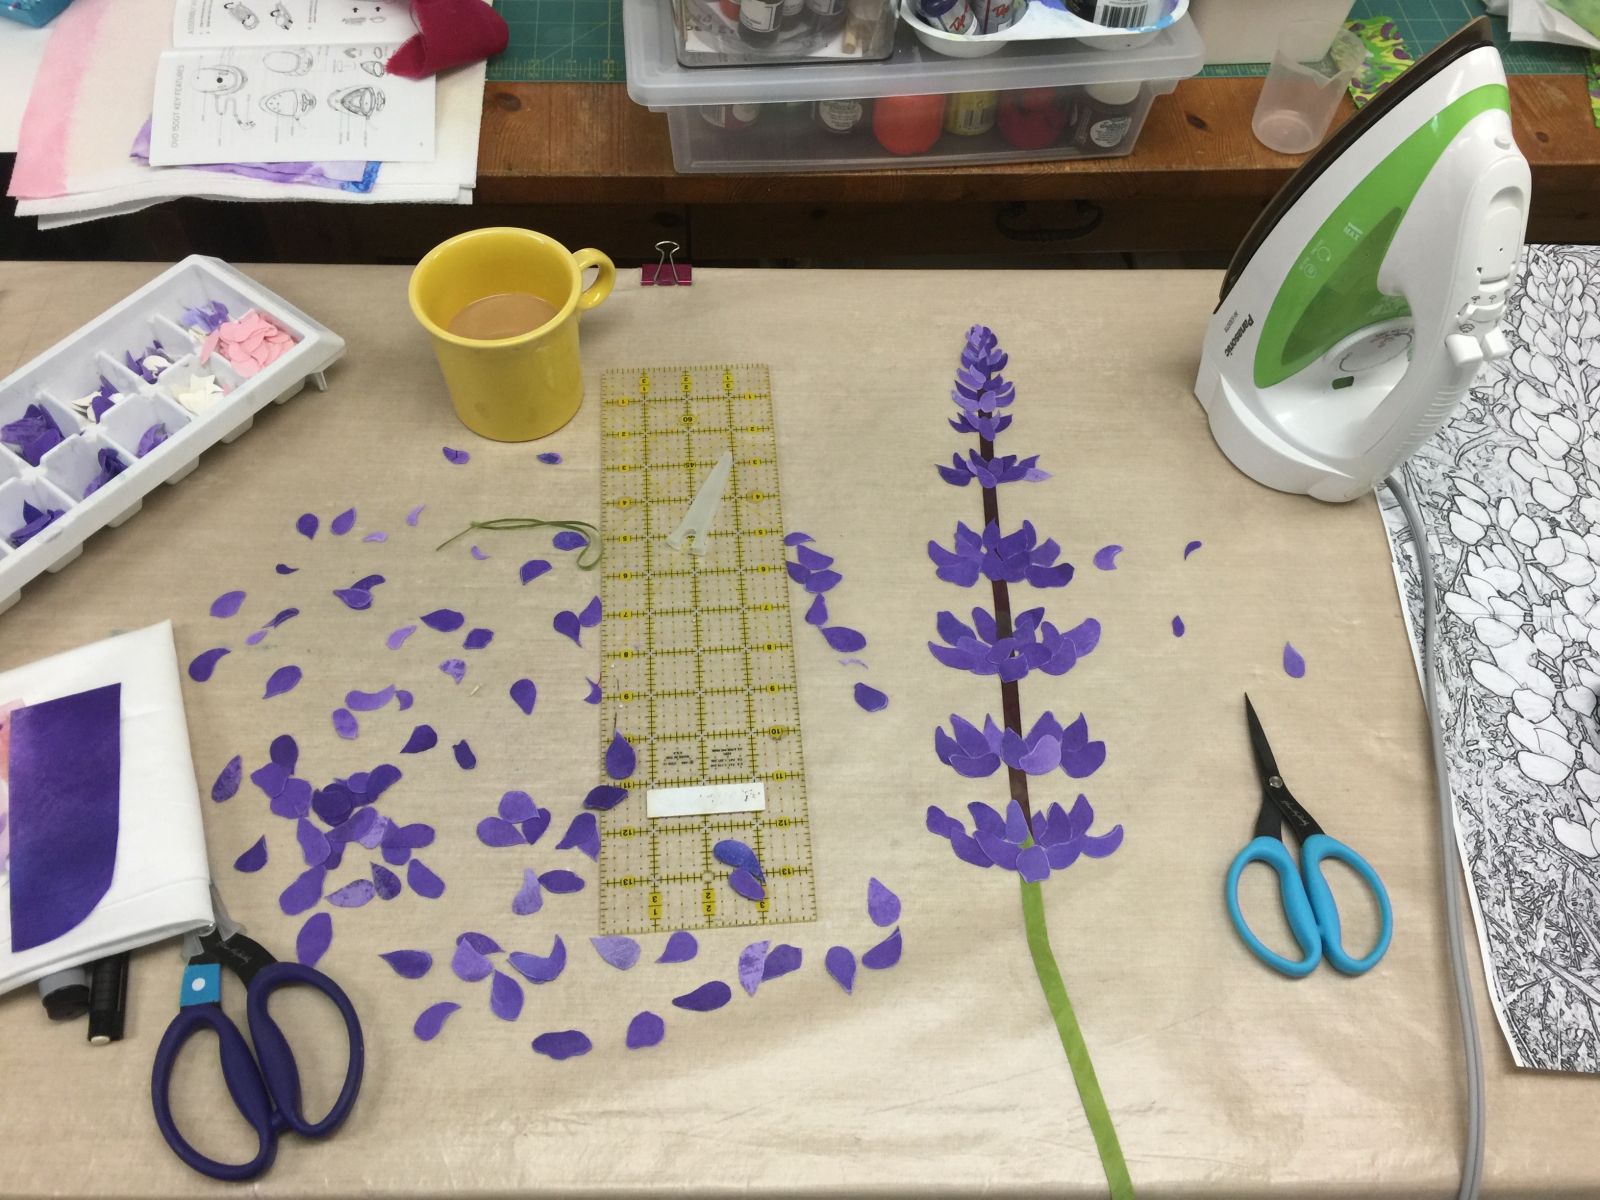
Creating the lupines was a ssslllloooowwwww process, but rewarding because they actually LOOKED like lupine. I realized when I first pinned the first two up, however, that lupines are mostly cylindrical, not conical. Because I create independent units, it is easy to correct errors like this—I simply unpeel the extra petals and adjust. If I had fused each petal directly to the background, my life would be considerably more difficult.

Once all the lupines are done (hallelujah!!!), I “fuse-baste” them with a quick tap of the iron onto the top. Then I can refine placement and spacing. I ended up adjusting the height of several of the flowers after this photo, and moved the clump on the right a bit farther right so it wouldn’t seem as though the single white lupine was smack in the middle. Once I finalize placement, I tack them down a bit more, but not completely because I will need to tuck foliage behind some of the petals.
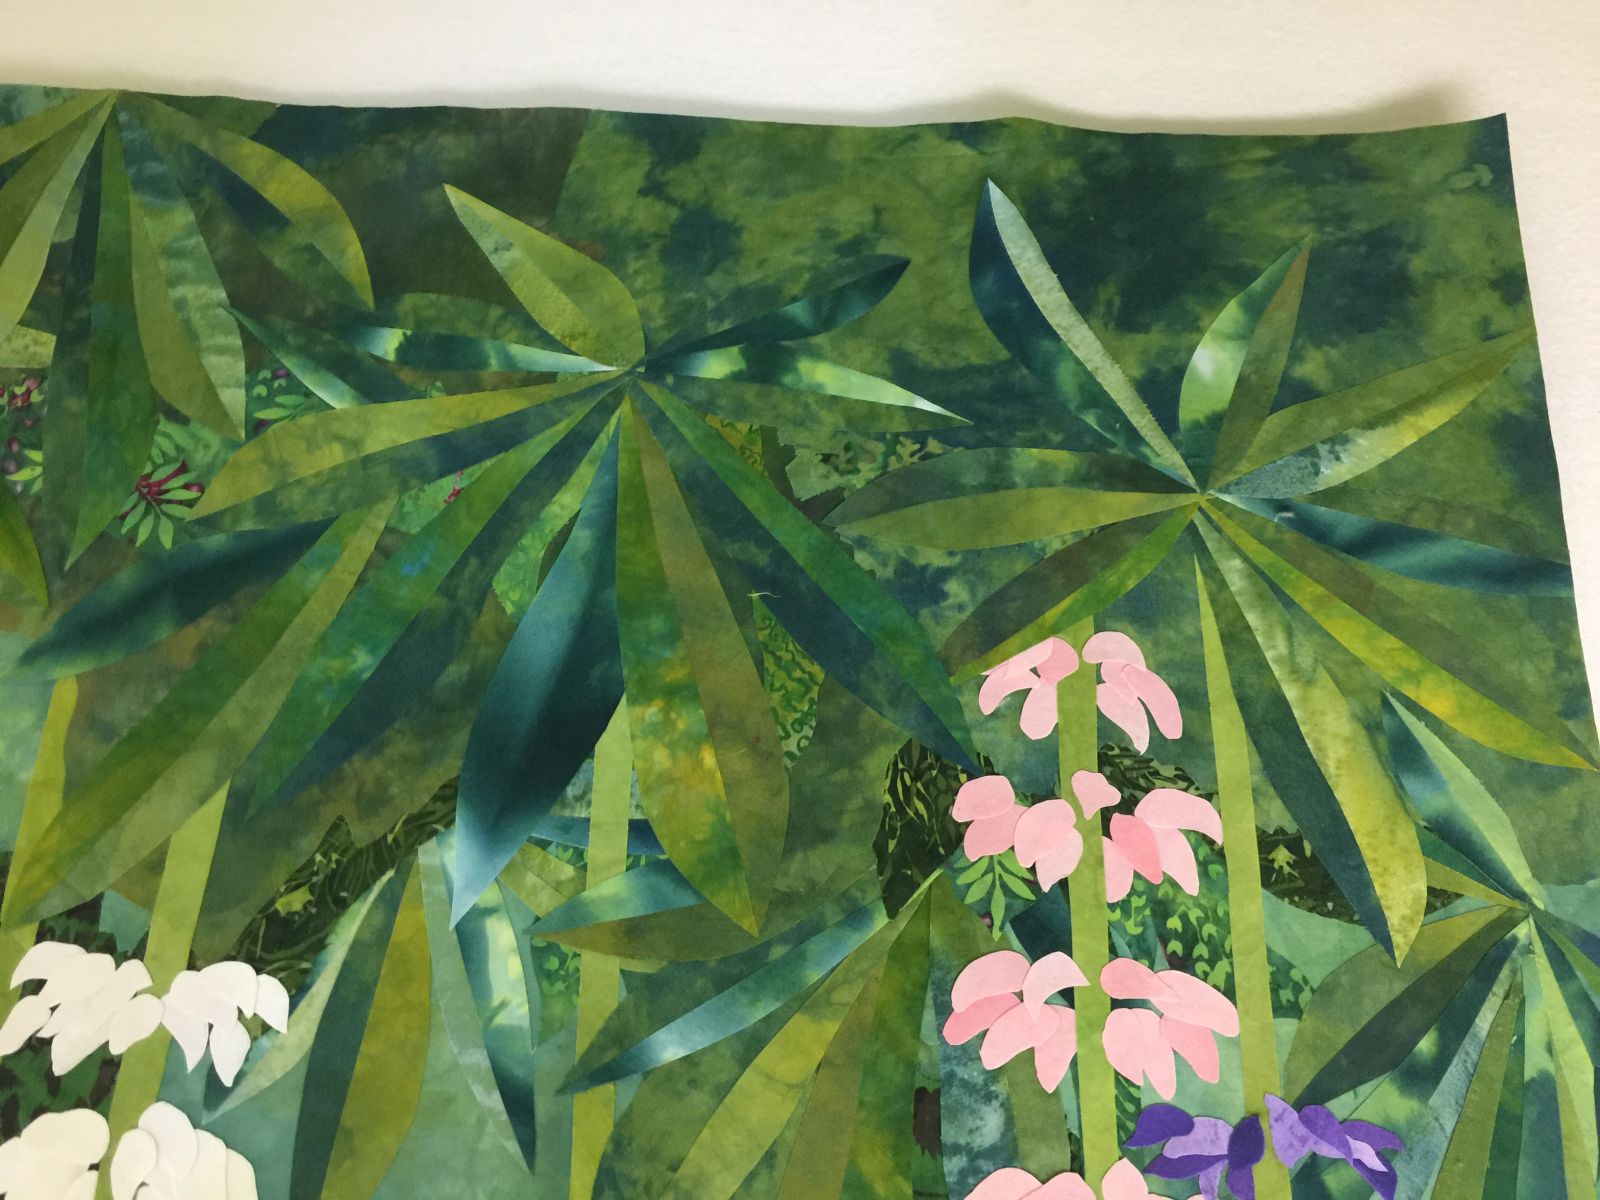
The end of top construction is in sight! After trying out leaves made of a single piece of fabric, I decided two-piece leaves better captured the sharp crease and vein in the center of each petal. I went into assembly line mode, cutting one leaf shape, then another about ¼” larger all around. I stacked these and cut them up the center, then swapped sides to create two leaves out of two fabrics. Once fused, these were then trimmed into final shape. On the ironing board, I sorted the leaves into dark on the left, same value in the middle, and dark on the right.
I ended up not following the lighting in the photo and using random pairings and groupings of leaves, but the spontaneous mixing seems to work and suggests the filtered light at the base of the plants. Finally, ready to square up, add batting and backing, select thread colors and begin quilting!
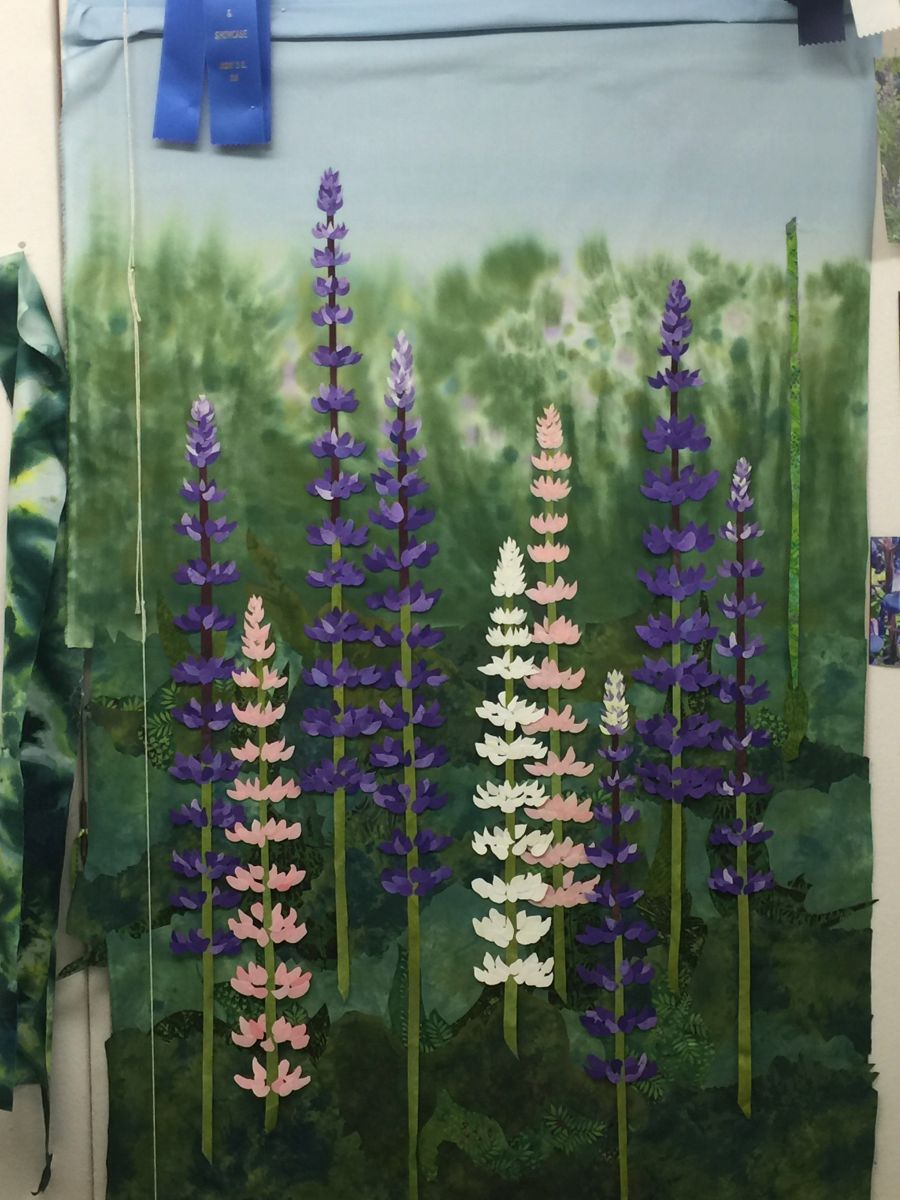
COMPLETED WORK
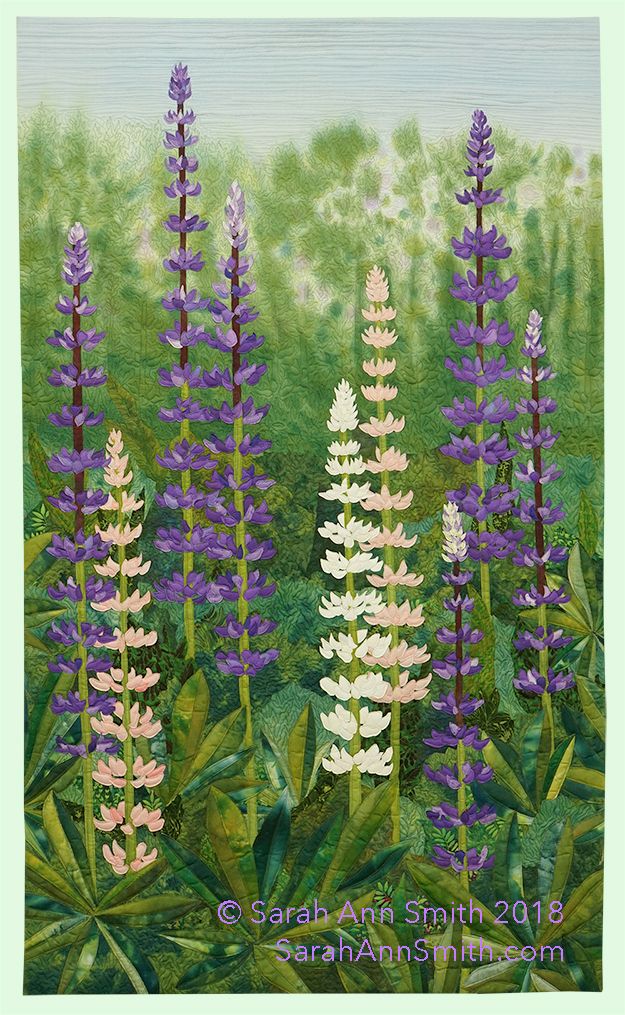
For more information about Marya and her artwork, please visit her website at: http://maryalowe.com/
DESIGN PROCESS
Wonky and Circle Construction
Fabric candidates are selected
Wonky block is laid out
Sewn wonkies can be used as is after fusing is ironed on back ...
...or can be sewn together for circles, with fusing ironed on back
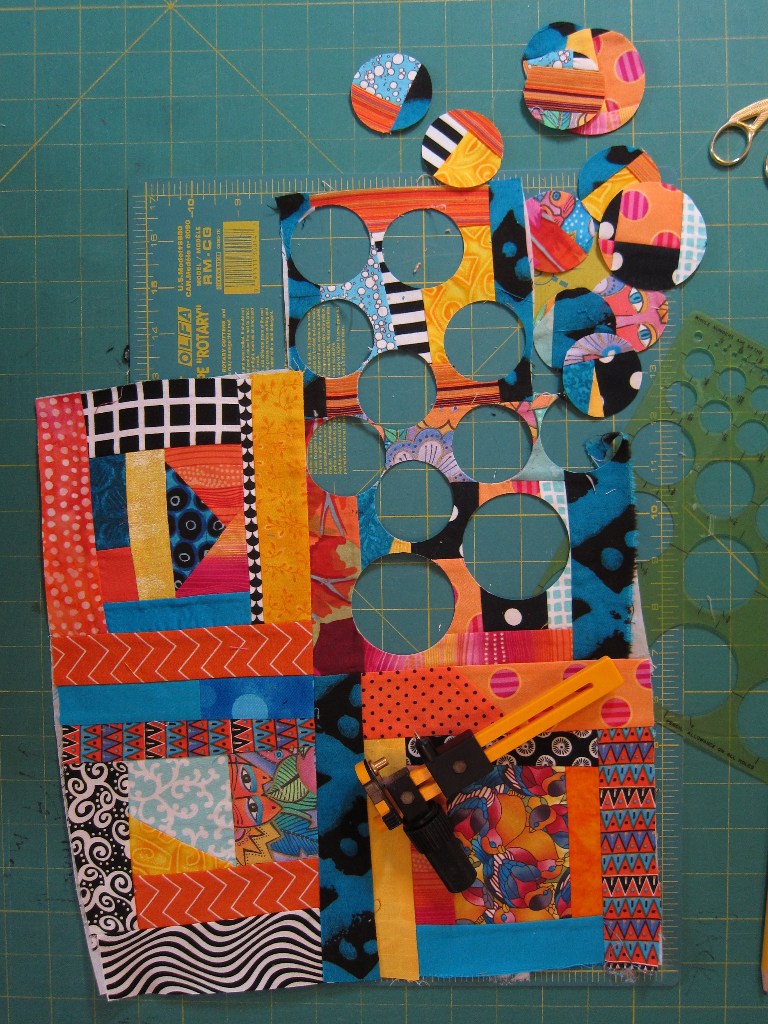
Circles are cut using Olfa Circle cutter or circle template
Felted Wood Construction
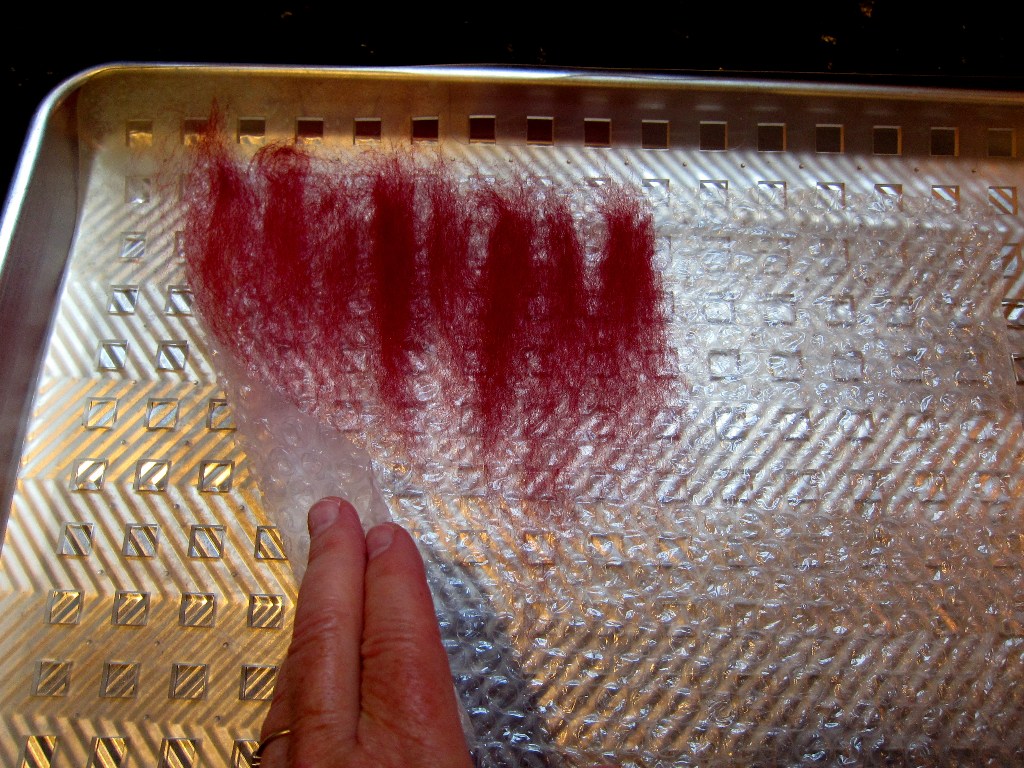
Wisps of wool roving are laid out on plastic wrap atop a rubber mat in a shallow pan
3-4 layers of wool are set down in a grid pattern

Embellishment threads, silks, and other wool colors are embedded within the layers
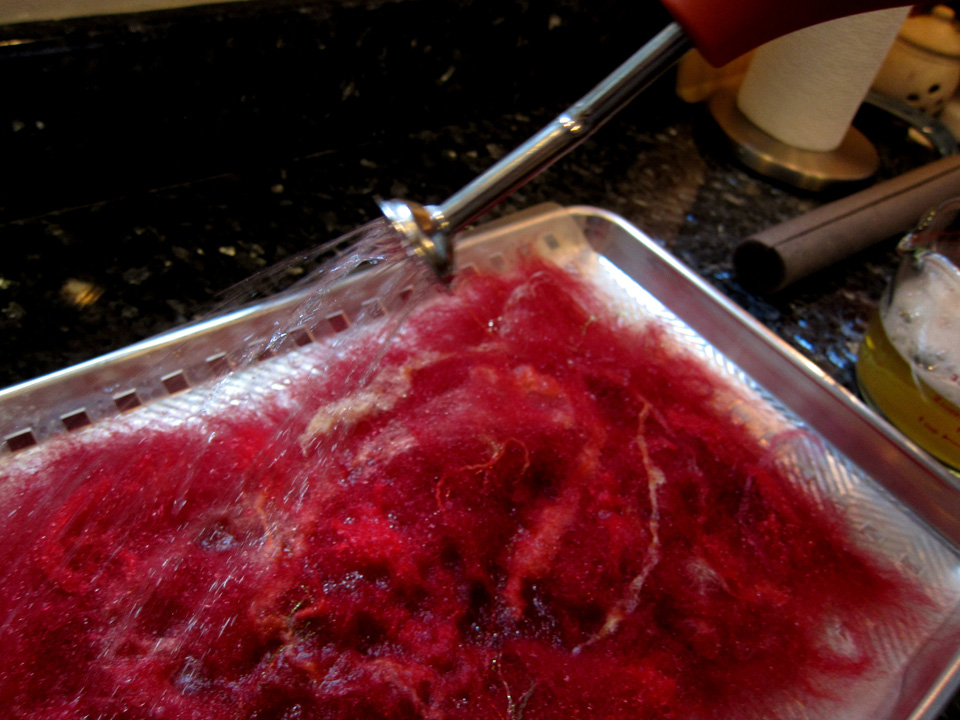
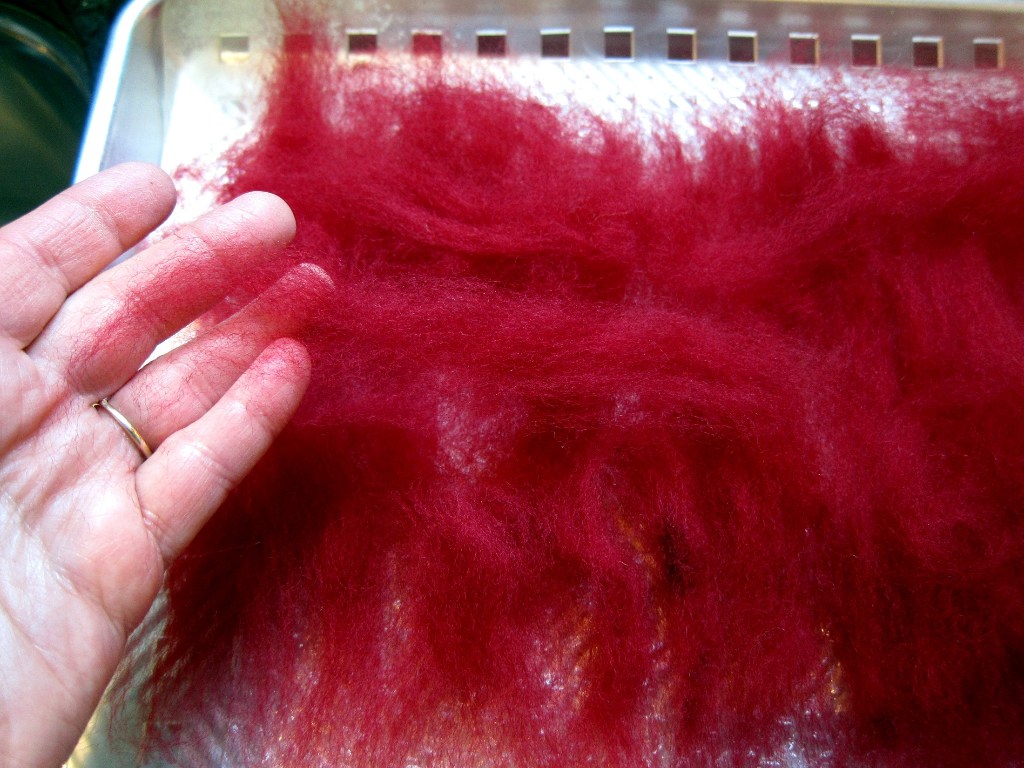
Hot soapy water is sprinkled on to thoroughly soak wool
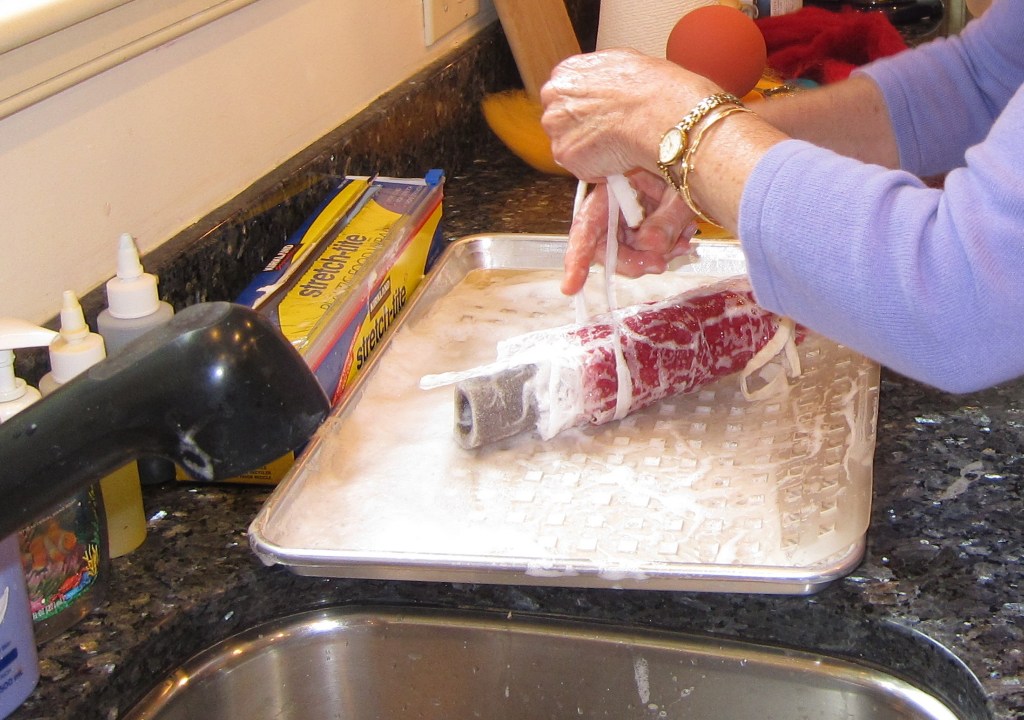
Soaked wool is rolled around foam roller and tied

Wool is rolled 400 times in various orientations against rubber mat
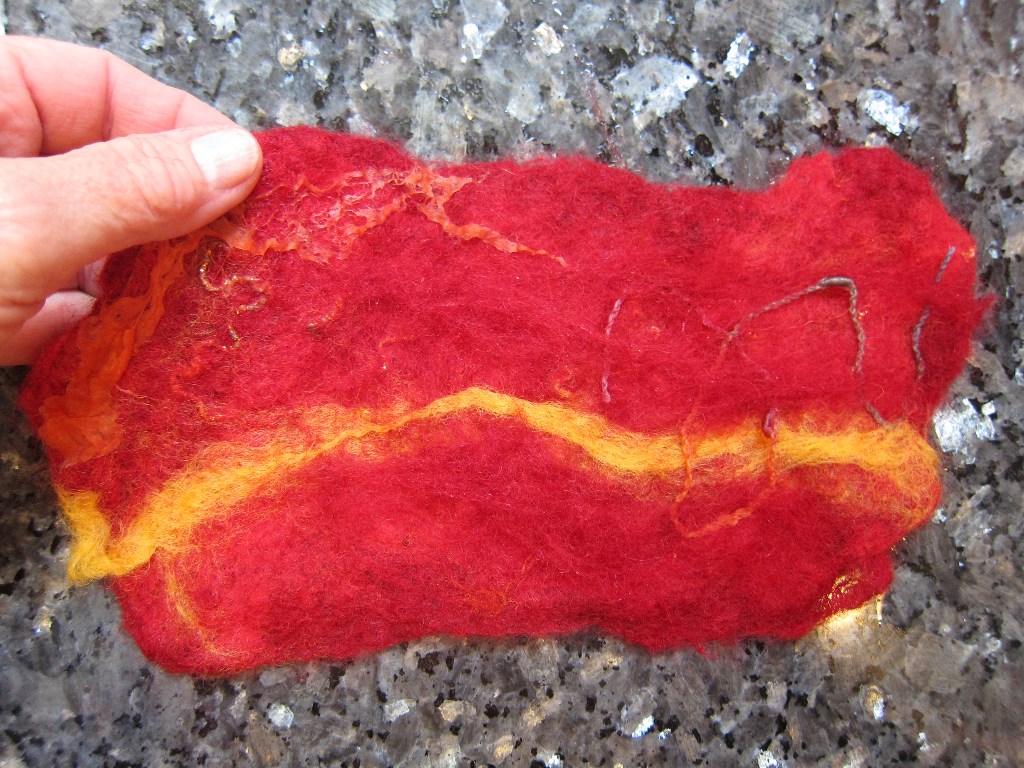
Sample of completed wool felt
